


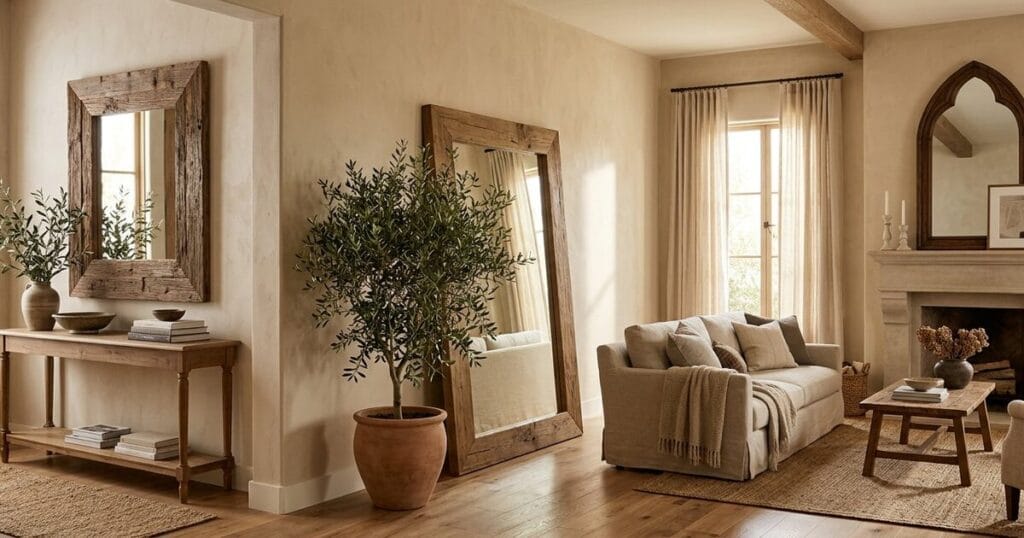
When it comes to elevating interior design, few home decor pieces offer the transformative power of a mirror. A well-placed mirror bounces natural sunlight into dark corners, visually doubles the size of modest rooms, and acts as an immediate architectural anchor. However, standard frameless mirrors or cheap plastic store-bought frames often lack warmth and character. By crafting your own DIY wooden mirror frames, you can introduce rich organic texture, custom joinery, and tailored dimensions that harmonize perfectly with your home’s unique aesthetic.
Whether you want to upgrade a builder-grade vanity mirror without removing it from the wall, build a commanding six-foot floor mirror for a master bedroom, or transform leftover workshop scraps into an intricate herringbone mosaic piece, wood framing is one of the most rewarding woodworking projects. Better yet, mirror frames require minimal timber, basic workshop tools, and straightforward cuts—making them accessible to beginners while offering endless creative refinement for seasoned craftspeople. Here are ten stunning DIY wooden mirror frame ideas to inspire your next weekend project.
1. Rustic Farmhouse Reclaimed Barn Wood Frame
There is an undeniable charm to authentic reclaimed barn wood, weathered fence boards, and aged pallet timbers. The deep grain grooves, historic nail holes, and silver-gray patina tell a story that factory-made furniture simply cannot duplicate. A rustic farmhouse mirror frame crafted from reclaimed wood serves as a heartwarming centerpiece above an entryway console table or living room mantle, adding earthy warmth to crisp modern walls.
To create this frame, select 1×4 or 1×6 reclaimed boards that share a similar moisture content and thickness. Clean the boards thoroughly with a stiff nylon brush and treat any lingering splinters with a light 150-grit sanding—being careful not to erase the natural weathered patina. Use simple pocket-hole joinery on the back side to join the four frame members, then rout a shallow 3/8-inch rabbet along the inner back edge to seat your glass mirror securely. Seal the timber with a clear matte water-based polyurethane to protect the wood while preserving its organic rustic character.


Alt text: A rustic farmhouse mirror frame made from weathered reclaimed barn wood with natural grain texture hanging above a wooden entryway table.
- Difficulty Level: Beginner
- Estimated Budget: $20 – $40 (depending on glass and wood source)
- Key Woodworking Elements: Reclaimed 1×4 pine or barn boards, pocket-hole joinery, routed rabbet back-lip, clear matte polyurethane finish
2. Builder-Grade Bathroom Mirror Frame-Up
One of the most common eye-sores in modern homes is the plain, frameless builder-grade sheet mirror glued directly to the bathroom wall above the vanity. Replacing these oversized mirrors can be hazardous, expensive, and damaging to drywall. The clever woodworking solution is to build a custom lightweight wooden frame that mounts directly onto the perimeter of the existing glass using industrial construction adhesive.
Start by selecting lightweight, kiln-dried 1×3 or 1×4 pine or moisture-resistant poplar boards. Measure the outer perimeter of your existing mirror and cut your boards at precise 45-degree mitered angles. Sand the front and sides to 220-grit smoothness, then apply an oil-based stain or moisture-defying paint to match your bathroom vanities. Important: paint or stain the back inner edge of the wood trim as well, since its reflection will be visible in the mirror! Once finished, apply horizontal beads of heavy-duty mirror adhesive to the back of the frame and press it firmly onto the glass, securing it temporarily with painter’s tape until cured.

Alt text: A stylish wooden frame trim added onto a large builder-grade bathroom vanity mirror with dual sinks and warm lighting.
- Difficulty Level: Beginner
- Estimated Budget: $25 – $50
- Key Woodworking Elements: Lightweight 1×3 poplar or pine, 45-degree miter joints, moisture-resistant protective sealer, construction mirror adhesive
3. Modern Minimalist White Oak Butt-Joint Frame
In Scandinavian, Japandi, and contemporary interiors, minimalism reigns supreme. A sleek, slim-profile white oak mirror frame celebrates clean geometry and the understated elegance of natural hardwood. Rather than ornate moldings or dark stains, this style relies on crisp right angles, pale wood tones, and flush butt joints that let the golden grain of the oak take center stage above a dining room sideboard or hallway bench.
Select 1×2 or 1×3 solid white oak lumber with straight, consistent grain patterns. For a modern industrial edge, use simple butt joints reinforced with hardwood dowels or decorative splines at the corners rather than traditional miters. Sand the frame meticulously through 120, 180, and 220 grit sandpapers until silky smooth. Finish with a high-quality hardwax oil or natural Danish oil; this deepens the grain slightly while leaving a zero-sheen, tactile finish that looks sophisticated and contemporary.

Alt text: A modern minimalist white oak mirror frame with clean lines and natural light wood grain mounted in a bright Scandinavian style room.
- Difficulty Level: Beginner to Intermediate
- Estimated Budget: $35 – $65
- Key Woodworking Elements: Kiln-dried white oak 1×2 lumber, reinforced butt joints with dowels, natural matte hardwax oil finish
4. Oversized Leaning Chunky Timber Floor Mirror
An oversized full-length floor mirror is a luxurious design statement that instantly elevates master bedrooms, walk-in closets, and dressing rooms. By framing a tall 6-foot mirror sheet in chunky 2×6 or 2×8 dimensional softwood timbers, you create a substantial architectural piece that leans gracefully against the wall, reflecting light across the entire room.
Because dimensional framing lumber from home centers often contains moisture, look for kiln-dried select pine or fir boards with minimal knots. Joint the edges square and create solid half-lap joints at the four corners using a dado blade or router—this provides superior mechanical strength for a heavy floor piece. If you want to explore more professional furniture joinery techniques for large-scale frames, check out Ted’s Woodworking plans for comprehensive diagrams and cut lists. Stain the frame in a warm walnut or honey tone and attach heavy-duty anti-tip safety straps to the back before leaning it against your wall.

Alt text: A dramatic oversized full length floor mirror with a chunky wooden frame leaning against a bedroom wall with soft lighting.
- Difficulty Level: Intermediate
- Estimated Budget: $50 – $90 (including large glass pane)
- Key Woodworking Elements: Chunky 2×6 pine or fir timbers, corner half-lap joinery, warm walnut oil stain, heavy-duty wall anchor safety straps
5. Cathedral Arched Wooden Mirror Frame
Arched and cathedral-top mirrors bring soft curves and European architectural romance into boxy modern rooms. Whether inspired by Mediterranean stucco villas or Gothic abbey windows, an arched wooden frame creates a stunning window-like illusion above a fireplace mantel or bedroom dresser.
Building a curved wooden frame requires creating an arched top rail. You can achieve this by tracing your desired arch onto a wide piece of 3/4-inch birch plywood or edge-glued pine panels and cutting it out with a jigsaw or bandsaw. Smooth the curved outer and inner radii using an oscillating spindle sander or flexible sanding block. Connect the arched top to vertical side rails using pocket screws or mortise-and-tenon joints, then rout a continuous rabbet on the reverse side to hold an arched glass mirror. Complete the look with a rich chestnut stain or a distressed lime-wash paint finish.

Alt text: An elegant cathedral arched wooden mirror frame with warm wood grain resting on a living room fireplace mantel.
- Difficulty Level: Intermediate
- Estimated Budget: $40 – $75
- Key Woodworking Elements: 3/4-inch birch plywood or edge-glued pine, jigsaw curved cuts, routed rabbet back-frame, chestnut or lime-wash finish
6. Herringbone & Chevron Scrap Wood Mosaic Frame
If your woodworking shop is overflowing with small cutoffs from past projects, a herringbone or chevron mosaic mirror frame is the ultimate way to turn workshop waste into high-end art. This intricate geometric layout adds incredible depth, movement, and visual interest, making the mirror frame look like a custom gallery piece that pairs beautifully with our [easy scrap wood projects](/easy-scrap-wood-projects/).
Begin by building a sturdy flat backing frame from 1/2-inch Baltic birch plywood with a central cutout for your mirror. Cut your scrap wood pieces—such as walnut, maple, cherry, and oak—into uniform 1-inch wide strips of equal thickness. Cut the ends at precisely 45 degrees for chevron or 90 degrees for herringbone, and arrange them dry on your plywood base to balance the contrasting wood tones. Glue the strips down with premium wood glue and pin nails, trim the outer edges flush with a track saw, and apply a satin lacquer to make the natural colors pop.

Alt text: An artistic mirror frame featuring a detailed herringbone mosaic pattern made from contrasting hardwoods like walnut and maple.
- Difficulty Level: Intermediate to Advanced
- Estimated Budget: $15 – $35 (using scrap wood cutoffs)
- Key Woodworking Elements: Hardwood scrap strips, 1/2-inch plywood backing substrate, precise 45-degree miter cuts, satin lacquer spray finish
7. Shou Sugi Ban Charred Wood Statement Frame
For homeowners who love moody, dramatic, and industrial aesthetics, a Shou Sugi Ban mirror frame offers unforgettable texture and deep charcoal luxury. Inspired by the ancient Japanese technique of preservation through wood burning, charring the surface of cedar or pine reveals intricate 3D grain relief that catches ambient room lighting in fascinating ways.
Select cedar or coarse-grained pine boards for the best charring results. After assembling your frame using strong miter or lap joints, use a propane weed-burning torch to scorch the top and side surfaces evenly until blackened. Once cooled, use a wire brass brush to scrape away the soft charred springwood, exposing the raised, harder summerwood grain lines. Wipe the frame clean and seal it generously with protective Tung oil or satin polyurethane to prevent any soot transfer and lock in the metallic charcoal sheen.

Alt text: A moody Shou Sugi Ban charred black wooden mirror frame with deep textured grain in an industrial modern living room.
- Difficulty Level: Intermediate
- Estimated Budget: $25 – $45
- Key Woodworking Elements: Cedar or pine lumber, propane torch surface burning, brass wire-brushing, Tung oil protective sealant
8. Round Porthole Bent-Lamination Wooden Mirror
Round mirrors soften angular rooms and look exceptionally chic above bathroom vanities, entryway benches, and hallway consoles. While cutting a flat circle out of plywood is one approach, building a genuine porthole-style frame using bent wood lamination or segmented rings results in a furniture-grade masterpiece with clean, continuous grain lines.
For an accessible ring-frame method, cut eight or twelve trapezoidal wood segments from 4/4 hardwood lumber and join them end-to-end with wood glue and biscuits to form an octagon or dodecagon polygon. Secure the assembly to a faceplate or use a circle-cutting router jig to carve the inner and outer circumferences into a perfect, seamless circle. Sand the curved profile to a bullnose or chamfered edge and finish with a warm amber shellac for an inviting, timeless appearance.

Alt text: A circular round wooden mirror frame with smooth beveled edges hanging above a contemporary wooden entryway console table.
- Difficulty Level: Intermediate to Advanced
- Estimated Budget: $30 – $60
- Key Woodworking Elements: Hardwood segmented ring joinery, circle-cutting router jig or lathe, bullnose edge profiling, amber shellac finish
9. Coastal Two-Tone Wire-Brushed Driftwood Frame
If your decor leans toward seaside cottage, coastal farmhouse, or relaxed California living, a weathered driftwood-style mirror frame adds an airy, sun-bleached elegance. This two-tone finishing technique replicates decades of ocean breeze and salt-spray weathering on fresh softwood lumber in just one afternoon.
Select soft pine or spruce boards and use a drill-mounted wire brush to rake across the grain, scouring out the softer wood fibers to create artificial weathering. Apply a base coat of pale gray or driftwood wood stain and let it dry completely. Next, brush a white chalk paint or white-wash glaze over the textured surface, immediately wiping it back across the grain with a lint-free rag so the white pigments settle into the brushed grooves. Assemble with simple butt joints and hang in a sunlit breakfast nook or bathroom.

Alt text: A coastal style weathered driftwood gray and whitewashed wooden mirror frame hanging on a bright shiplap wall.
- Difficulty Level: Beginner
- Estimated Budget: $20 – $40
- Key Woodworking Elements: Softwood pine lumber, mechanical wire-brush texturing, gray driftwood base stain, wiped white-wash glaze finish
10. Pocket-Hole Entryway Mirror with Built-In Display Shelf
Why settle for just a mirror when you can build an all-in-one entryway organizer? Adding a built-in bottom display shelf to a rectangular wooden mirror frame creates a practical spot to rest keys, sunglasses, small succulent pots, or fragrance bottles right where you leave the house. This functional design is a fantastic companion piece to our [wood accent wall ideas](/wood-accent-wall-ideas/) in entryways and mudrooms.
Construct a standard rectangular frame from 1×4 hardwood or premium pine boards, extending the bottom horizontal rail slightly wider than the frame sides. Attach a 1×4 or 1×6 shelf board horizontally at the base using pocket-hole screws from underneath and wood glue for rigid support. For added utility, screw three to five decorative antique brass hooks along the bottom apron to hang keys, dog leashes, or scarves. Finish with a durable water-resistant satin varnish to protect the shelf surface from wet keys and daily wear.

Alt text: A wooden entryway mirror frame featuring a convenient built-in display shelf holding small succulent pots and brass key hooks below.
- Difficulty Level: Beginner to Intermediate
- Estimated Budget: $30 – $55
- Key Woodworking Elements: 1×4 and 1×6 pine or maple, pocket-hole joinery, integrated bottom shelf with brass hooks, protective satin varnish
Conclusion
Building your own DIY wooden mirror frame is one of the highest-impact woodworking projects you can undertake for your home. Unlike expensive store-bought mirrors that use fragile plastics or thin veneers, a custom hardwood or reclaimed timber frame offers genuine structural durability and unmatched artisan character. Whether you start simple with a builder-grade bathroom trim-up or challenge your skills with a charred Shou Sugi Ban floor piece, each frame becomes an intentional design feature that reflects your style and craftsmanship.
To expand your home decor woodworking journey, check out our [Ted’s Woodworking review](/teds-woodworking-review-is-it-worth-it/) to see how comprehensive plan libraries can help you tackle even more custom furniture projects. Pick your favorite mirror frame idea from this list, gather your lumber, and transform your reflections today!
Affiliate Disclosure: This post contains affiliate links. If you purchase through our links, we may earn a small commission at no extra cost to you.