


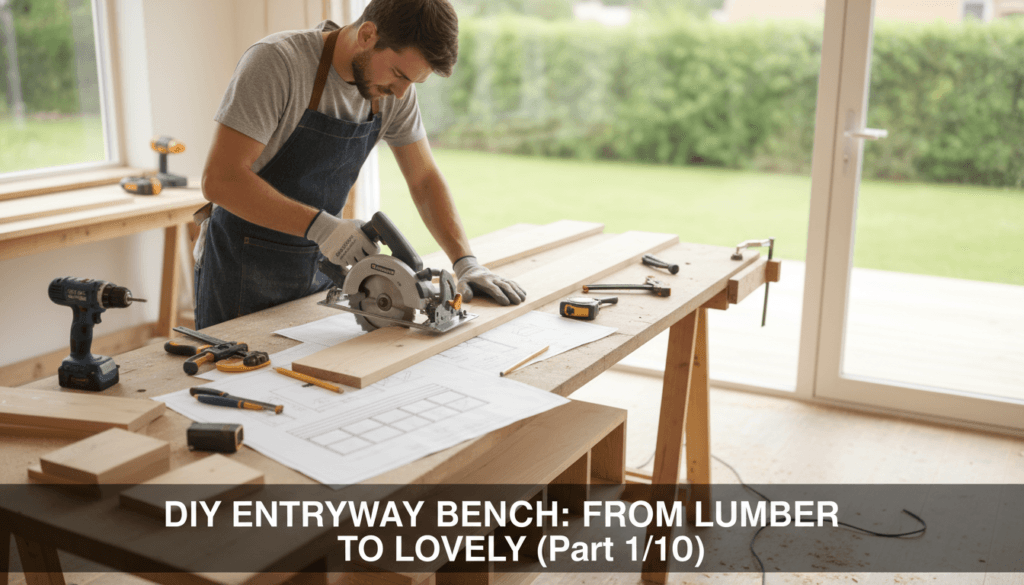
How to Build a DIY Wooden Entryway Bench with Shoe Storage
Building a custom DIY wooden entryway bench with shoe storage is one of the most rewarding home improvement projects you can undertake. Not only does it instantly elevate the aesthetic appeal of your home’s entrance, but it also provides a highly functional solution for organizing scattered footwear and reducing daily clutter. Every home needs a dedicated landing zone where family members and guests can comfortably sit to take off their shoes, and crafting this piece yourself ensures it perfectly fits your space. In this comprehensive guide, we will walk you through every phase of the construction process, from selecting the right lumber to applying a flawless finish. By mastering these fundamental techniques, you will create a durable, heirloom-quality furniture piece that seamlessly blends rustic charm with modern utility.
An organized entryway sets the tone for your entire home, transforming a chaotic drop zone into a welcoming sanctuary. When shoes, bags, and coats are left haphazardly by the front door, it creates subconscious stress and visual clutter that detracts from your interior design. By integrating a shoe storage bench into your foyer, you maximize vertical and horizontal space while hiding unsightly sneakers and boots within neatly divided cubbies. Whether you are an experienced builder or a weekend warrior looking to expand your skill set, this detailed tutorial will empower you to tackle this build with confidence. We will cover advanced tips on joinery, sanding schedules, and protective topcoats to guarantee your bench withstands years of heavy daily use.
Key Takeaways
- Proper planning and precise measurements are the foundation of a successful DIY bench build.
- Selecting the appropriate lumber, such as durable plywood for the carcass and solid hardwood for the top, ensures longevity.
- Utilizing pocket hole joinery creates strong, hidden seams that give your project a professional, seamless appearance.
- Applying a pre-stain wood conditioner prevents blotchy finishes and guarantees an even, beautiful stain application.
- Adding a clear polyurethane topcoat protects the wood from moisture, dirt, and scratches associated with daily footwear storage.
Designing Your Custom Shoe Storage Bench
Determining the Ideal Dimensions
Before purchasing materials or making a single cut, you must accurately measure your designated entryway space to determine the bench’s optimal dimensions. Standard seating height for an entryway bench typically falls between 18 and 20 inches, which allows most adults and children to sit comfortably while tying their shoes. The depth of the bench should generally be between 14 and 16 inches; this provides adequate seating area without protruding too far into high-traffic walkways. When calculating the width, consider both the physical constraints of your wall and the number of shoe cubbies you wish to incorporate. A bench that is 48 inches wide offers ample room for three to four distinct storage compartments, making it a versatile choice for average-sized families.
It is crucial to factor in the specific types of footwear you intend to store when planning the internal heights of your storage cubbies. Standard sneakers and flats require about 6 to 8 inches of vertical clearance, whereas winter boots or tall heels may need 12 to 14 inches. You can design an asymmetrical storage layout with one tall section for boots and multiple shorter sections for everyday shoes to maximize the utility of the space. If you are unsure about future storage needs, consider drilling adjustable shelf pin holes instead of permanently attaching the internal dividers. This adaptable design choice allows you to reconfigure the shelving heights as your family’s footwear collection changes over time, adding immense long-term value to your project.
Selecting the Best Wood for the Project
Choosing the correct type of wood is a critical decision that impacts both the structural integrity and the final visual appeal of your DIY bench. For the main frame and internal dividers, using high-quality 3/4-inch birch or oak plywood is highly recommended because it is incredibly strong, resists warping, and provides a smooth surface for finishing. Plywood is manufactured by gluing together multiple thin layers of wood veneer, which gives it exceptional dimensional stability compared to solid lumber. You can learn more about the structural benefits of this material by exploring the history and engineering behind plywood sheets. For the visible edges of the plywood, you will apply iron-on edge banding to conceal the raw layers, creating the illusion of solid wood construction.
For the bench top, investing in a solid wood panel or edge-glued boards will provide the durability needed to withstand constant sitting and dropping of heavy bags. Softwoods like pine wood are budget-friendly and easy to cut, but they are prone to dents and scratches if not properly sealed with a hard-wearing topcoat. If your budget allows, upgrading to a hardwood such as oak, maple, or walnut will yield a vastly superior, scratch-resistant surface that ages beautifully over time. For more tips on selecting materials for your custom pieces, check out our comprehensive comprehensive woodworking guides. Regardless of the species you choose, ensure the lumber is kiln-dried and straight to prevent the bench top from bowing or cupping after assembly.
Gathering the Necessary Tools and Materials
Essential Woodworking Tools
Equipping yourself with the right tools will streamline the construction process and significantly improve the accuracy of your cuts and joints. At a minimum, you will need a reliable circular saw or table saw to rip the large plywood sheets down to your required depths and widths. A miter saw is invaluable for making perfectly square crosscuts on your trim pieces and solid wood top components. For assembly, a pocket hole jig is the secret weapon for beginner and intermediate builders alike, allowing you to create incredibly strong joints without complex traditional joinery. If you need to upgrade your workshop arsenal before starting, browse our list of recommended woodworking tools for detailed product reviews and purchasing advice.
In addition to cutting and joining tools, an orbital sander is absolutely essential for achieving a professional, splinter-free finish. You will also need a power drill, an assortment of clamps (including right-angle clamps and long bar clamps), a tape measure, a speed square, and a reliable stud finder if you plan to anchor the bench to the wall. Having a dedicated combination square will help you mark precise lines for your pocket holes and ensure your shelves are perfectly level during installation. Preparing your workspace by organizing these tools beforehand will save you immense frustration and keep your project moving forward smoothly.
Complete Materials List
Purchasing all your materials in a single trip to the hardware store ensures consistency in wood grain and prevents disruptive delays during your build. You will need one 4×8 sheet of 3/4-inch hardwood plywood for the bench carcass, bottom panel, and internal dividers. For the top, purchase edge-glued pine or oak panels, or several 1×4 solid boards to laminate together yourself. A 1/4-inch sheet of beadboard or plain sanded plywood is required for the back panel to give the bench lateral stability and a finished look. Additionally, pick up a roll of 3/4-inch iron-on edge banding that matches your plywood species to cover all exposed plywood edges.
Do not overlook the crucial hardware and finishing supplies required to assemble and protect your masterpiece. You will need a box of 1 1/4-inch coarse-thread pocket hole screws, high-quality waterproof wood glue, 1-inch brad nails for attaching the back panel, and a tub of stainable wood filler to patch any minor imperfections. For the finishing phase, gather 80-grit, 120-grit, and 220-grit sandpaper discs, a pre-stain wood conditioner, your preferred wood stain, and a clear polyurethane sealer. Always double-check your inventory against your cut list to ensure you have slightly more material than necessary to account for potential mistakes.
Prioritizing Woodworking Safety
Maintaining strict safety protocols in your workshop is the single most important aspect of any DIY project to prevent serious injuries. Power tools operate at incredibly high speeds and can cause severe damage in a fraction of a second if proper precautions are ignored. Always wear ANSI-approved safety glasses to protect your eyes from flying sawdust and wood chips, and utilize hearing protection when operating loud machinery like table saws and routers. It is imperative to familiarize yourself with standard safety practices by reviewing the OSHA woodworking safety standards before you begin. Furthermore, ensure your workspace is well-ventilated, especially during the sanding and staining phases, to avoid inhaling harmful particulate matter and chemical fumes.
Proper tool handling and maintaining a clean work environment will drastically reduce the risk of accidents and improve the overall quality of your work. Never bypass safety guards on your saws, and always use push sticks when feeding wood through a table saw to keep your fingers far away from the spinning blade. Keep your shop floor swept and free of tripping hazards like extension cords and offcuts. Wearing well-fitted clothing and tying back long hair prevents anything from getting caught in moving machinery. By cultivating a mindset of cautious respect for your tools, you guarantee a safe, enjoyable, and productive building experience.
Step 1: Measuring and Cutting the Wood
Creating a Master Cut List
Translating your design into a detailed cut list minimizes material waste and ensures every piece fits together with mathematical precision. Start by calculating the dimensions for the two side panels, the bottom panel, and the top support stretchers, keeping in mind that the thickness of the material must be subtracted from the overall exterior dimensions. For example, if your bench is going to be 48 inches wide and you are using 3/4-inch plywood for the sides, your bottom panel must be cut to exactly 46 1/2 inches to fit snugly between them. Take your time measuring and marking each cut on the plywood sheet, utilizing a straight edge or a track saw guide to guarantee perfectly straight lines. Label each piece lightly with a pencil as soon as it is cut so you do not confuse the dividers with the side panels during assembly.
Precision during the cutting phase dictates the squareness and stability of the entire piece of furniture. When cutting the internal dividers, ensure they are exactly the same height; even a 1/16-inch discrepancy will cause the bench top to wobble or sit unevenly. If you are using a circular saw, place masking tape over the cut line before sawing to minimize tear-out and chipping on the delicate wood veneer. For those looking to dive deeper into the mechanics of precise lumber sizing, exploring the history and techniques of traditional woodworking provides excellent foundational knowledge. Remember the golden rule of carpentry: measure twice, cut once, and always account for the kerf (thickness) of your saw blade when marking consecutive pieces on a single board.
Applying Edge Banding
Applying edge banding to the exposed plywood edges is a simple yet transformative step that elevates your project from amateur to professional. Cut strips of edge banding slightly longer than the exposed edges of your side panels, bottom board, and front-facing dividers. Preheat a standard household iron to the cotton setting (no steam) and slowly run it over the edge banding, applying firm downward pressure to activate the heat-sensitive adhesive. The heat melts the glue, securely fusing the thin wood veneer directly to the rough plywood edge. Once the strip is applied, use a flat block of wood to press down firmly along the entire length while the glue cools and sets.
Trimming the excess edge banding accurately ensures a seamless transition between the face veneer and the newly banded edge. After the glue has completely cooled, use a specialized edge banding trimmer or a sharp utility knife to carefully slice off the overhanging veneer flush with the plywood faces. Sand the newly trimmed edges lightly with 120-grit sandpaper to remove any sharp corners and blend the banding seamlessly into the plywood. Taking the time to properly band and sand every visible edge will make your affordable plywood project completely indistinguishable from an expensive solid hardwood piece.
Step 2: Assembling the Outer Frame
Drilling Pocket Holes
Utilizing pocket hole joinery provides unparalleled strength for the bench carcass while keeping all screws completely hidden from view. Set your pocket hole jig and drill bit collar to the 3/4-inch thickness setting to match your plywood material. Drill two to three pocket holes along the undersides of the bottom panel edges where they will intersect with the vertical side panels. You should also drill pocket holes into the top support stretchers, which will eventually be used to securely attach the solid wood top from underneath. Keep the pocket holes spaced evenly, roughly every 6 to 8 inches, to ensure adequate holding power across the entire joint.
Proper placement of the pocket holes guarantees that they will be invisible once the bench is placed in its final location. Always drill the holes on the faces of the wood that will be hidden, such as the underside of the bottom shelf or the back edges of the side panels. Before driving the screws, clamp the two adjoining pieces of wood together securely using a right-angle clamp to prevent the boards from shifting or sliding out of alignment. If you are interested in exploring more advanced furniture builds, browse our gallery of DIY furniture projects for inspiration on utilizing pocket holes in various applications.
Constructing the Carcass
Assembling the main frame requires careful attention to squareness, as an out-of-square frame will cause compound errors in subsequent steps. Apply a thin, even bead of high-quality wood glue along the edge of the bottom panel before aligning it flush with the bottom inside edge of the side panel. Drive the 1 1/4-inch pocket hole screws into the pre-drilled holes, setting your drill’s clutch to a moderate setting to avoid stripping the screws or driving them too deep. Repeat this process for the opposite side panel, ensuring the bottom shelf is perfectly level and flush with the front edges. Wood glue is incredibly strong, often stronger than the wood itself, so the combination of glue and screws creates a virtually indestructible joint.
Installing the top support stretchers ties the two side panels together and gives the bench its immense lateral rigidity. Position the front stretcher horizontally across the top front edge of the side panels and secure it with wood glue and pocket screws. Install a second stretcher along the top back edge in the same manner. After the four main frame pieces (two sides, bottom, and stretchers) are assembled, use your speed square to check the internal corners; they must be exactly 90 degrees. Wipe away any wet glue squeeze-out immediately with a damp rag, as dried glue will block the wood stain from penetrating the surface and leave unsightly light patches.
Step 3: Installing the Shoe Storage Shelves
Measuring and Fitting the Dividers
Installing the vertical dividers accurately is crucial for creating uniform, aesthetically pleasing shoe cubbies that maximize storage capacity. Measure the internal distance between the bottom panel and the top stretchers to verify the exact height needed for your vertical dividers, trimming them slightly if necessary for a perfect friction fit. Mark the layout of your cubbies on the bottom panel and the top stretchers, using a combination square to draw straight, plumb guidelines. Apply wood glue to the top and bottom edges of the first divider, slide it into place along your guidelines, and use a level to ensure it is perfectly vertical. Secure the dividers by driving pocket hole screws from the underside of the bottom panel and the inside of the top stretchers.
For added horizontal storage, installing fixed or adjustable middle shelves within the cubbies drastically increases the number of shoes the bench can hold. If opting for fixed shelves, drill pocket holes on the undersides of the shelf boards and secure them between the vertical dividers using glue and screws. Cut spacer blocks from scrap wood to support the horizontal shelves at the exact same height during installation, which eliminates the guesswork of leveling them manually. The geometric grid created by the dividers and shelves not only provides specialized storage but also acts as a structural truss system, vastly increasing the weight capacity of the seating surface.
Attaching the Back Panel
Attaching a solid back panel is a non-negotiable step that prevents the bench from racking side-to-side under the weight of sitting bodies. Measure the overall width and height of the back of your assembled frame and cut your 1/4-inch plywood or beadboard slightly smaller than these dimensions so the edges do not protrude. Lay the bench face down on a flat surface and run a continuous bead of wood glue along the back edges of the side panels, bottom panel, stretchers, and all internal dividers. Carefully align the back panel over the frame, ensuring it is perfectly square with the outer edges of the bench carcass.
Securing the back panel to every internal divider tightly binds the entire structure together into one cohesive, immovable unit. Use a brad nailer with 1-inch nails to tack the back panel into the outer frame, spacing the nails approximately every 4 inches. Once the perimeter is secure, carefully shoot brad nails through the back panel directly into the center of the internal dividers and horizontal shelves. If you do not have a pneumatic brad nailer, you can use 1-inch wood screws or traditional trim nails and a hammer, taking care not to splinter the thin backing material. Let the entire assembly dry overnight to allow the wood glue to achieve maximum bond strength.
Step 4: Preparing and Attaching the Bench Top
Constructing the Solid Wood Top
Crafting a thick, overhang bench top adds a striking visual contrast to the painted or stained base and provides a comfortable seating area. If you are making the top from individual 1×4 or 1×6 boards, you must joint the edges perfectly straight and glue them together using long bar clamps. Apply glue evenly along the edges, press the boards together, and alternate the clamps over and under the panel to prevent the wood from bowing under pressure. Allow the glued panel to cure for at least 24 hours before scraping off the dried glue squeeze-out and trimming the ends square with a circular saw. Alternatively, purchasing a pre-made edge-glued pine or butcher block panel can save considerable time and effort while guaranteeing a perfectly flat surface.
The bench top should feature a slight overhang on the front and sides to give the furniture a classic, balanced proportion. Typically, an overhang of 1 inch on the front and 1/2 inch on each side provides an elegant profile without obstructing the shoe cubbies below. Sand the bench top thoroughly, starting with 80-grit sandpaper to remove any mill marks or glue lines, progressing to 120-grit, and finally smoothing it out with 220-grit. Pay special attention to the sharp 90-degree edges, slightly rounding them over with your sander or a router to make the seat more comfortable against the back of the knees.
Securing the Top to the Base
Fastening the solid wood top to the plywood base from underneath ensures that no ugly screw heads ruin the pristine seating surface. Place the solid top upside down on a clean, soft blanket on your workbench, and center the assembled base upside down on top of it. Measure the overhang on all sides to guarantee the base is perfectly centered, and temporarily clamp the base to the top to prevent shifting. Drive 1 1/4-inch wood screws through the pre-drilled pocket holes in the top stretchers directly into the underside of the solid wood top.
Allowing for slight wood movement in the solid top is essential to prevent it from cracking or splitting during seasonal humidity changes. Unlike plywood, solid wood expands and contracts across its grain; therefore, driving screws tightly through oversized holes or utilizing figure-eight metal fasteners can accommodate this natural movement. Do not use wood glue when attaching the solid top to the plywood base, as the opposing expansion rates of the two materials will eventually cause the joint to fail or the wood to tear. Once securely fastened, flip the heavy bench right-side up, and marvel at the structurally complete piece of custom furniture you have just built.
Step 5: Finishing Techniques for Longevity
Sanding and Wood Preparation
A flawless, professional-grade finish is entirely dependent on meticulous sanding and surface preparation before any stain or paint is applied. Inspect the entire bench for any gaps in the joinery, tear-out from the saw blades, or minor dents, and fill them carefully with a stainable wood filler. Once the filler is completely dry, use your random orbital sander with 120-grit sandpaper to sand the entire plywood base, paying close attention to the edge-banded surfaces. Progress to 220-grit sandpaper for a final pass, ensuring the wood is butter-smooth to the touch and the grain is fully opened to accept the stain. Hand-sand any tight internal corners inside the cubbies where the orbital sander cannot reach.
Removing every trace of sawdust from the bench is a mandatory step that prevents a gritty, textured finish from ruining your hard work. Use a shop vacuum with a soft brush attachment to remove the bulk of the dust from the cubbies and surfaces. Follow up by wiping down the entire piece with a tack cloth or a lint-free rag lightly dampened with mineral spirits. If you need personalized advice on rectifying a finishing mistake, do not hesitate to contact our design team for expert troubleshooting.
Staining and Sealing the Bench
Applying a pre-stain wood conditioner is the critical secret to achieving a rich, uniform color, especially when working with porous woods like pine or birch plywood. Brush the conditioner generously over the raw wood, let it soak in for 10 to 15 minutes, and wipe away the excess with a clean rag. Within two hours of applying the conditioner, apply your chosen wood stain using a foam brush or a lint-free cloth, working in the direction of the wood grain. Let the stain penetrate for 5 to 10 minutes depending on your desired color depth, then vigorously wipe off all unabsorbed stain with a clean cloth. Allow the stained bench to dry in a well-ventilated area for a minimum of 24 hours, or until the surface is no longer tacky to the touch.
Sealing the wood with multiple coats of clear polyurethane provides the essential armor required to protect the bench from wet shoes, mud, and daily wear. Stir the polyurethane gently—never shake it, as this introduces air bubbles—and apply a thin, even coat using a high-quality synthetic bristle brush. Let the first coat dry completely, then lightly sand the entire surface with 320-grit sandpaper or super-fine steel wool to knock down any raised wood fibers. Wipe away the dust and apply a second and third coat, repeating the sanding process between each layer to build a glass-like, incredibly durable finish. For an in-depth understanding of how different protective topcoats react with various wood species, review the science behind wood finishing techniques.
Adding Custom Touches and Upholstery
Customizing your bench with a tailored, upholstered cushion elevates the comfort level and introduces beautiful textile textures into your entryway decor. Cut a piece of 1/2-inch plywood slightly smaller than the bench top to serve as the cushion base, and attach a layer of 2-inch or 3-inch high-density upholstery foam using spray adhesive. Wrap the foam in polyester batting to soften the edges, then stretch your chosen upholstery fabric tightly over the batting, stapling it securely to the underside of the plywood base. Heavy-duty fabrics like canvas, tweed, or faux leather are excellent choices for entryway cushions because they are highly resistant to stains and abrasions. You can secure the finished cushion to the bench top using heavy-duty Velcro strips, allowing you to easily remove it for cleaning or seasonal fabric updates.
Integrating supplementary hardware like decorative hooks, label holders, or woven storage baskets transforms the bench into a comprehensive mudroom organization system. If your bench design includes a tall backrest or is situated below a wall-mounted coat rack, matching the metal finishes of your coat hooks to the hardware on your front door creates a cohesive interior design scheme. Sliding wicker or wire baskets into the lower shoe cubbies can hide exceptionally dirty footwear or corral loose items like winter gloves, dog leashes, and umbrellas. These thoughtful, personalized additions ensure that your DIY entryway bench is not merely a piece of furniture, but a highly functional command center for your family’s daily routines.
Conclusion: Enjoying Your New Entryway Bench
Completing a custom DIY wooden entryway bench with shoe storage is a monumental achievement that dramatically enhances both the form and function of your home. You have successfully navigated the complexities of lumber selection, precision cutting, advanced pocket hole joinery, and professional finishing techniques to create a bespoke piece of furniture. This bench will faithfully serve as the welcoming focal point of your foyer, providing a sturdy place to sit and keeping your floors completely free of scattered shoes. By applying the skills learned in this comprehensive tutorial, you are now well-equipped to tackle even larger cabinetry and woodworking projects throughout your home. Embrace the pride that comes with building your own furniture, and enjoy the beautiful, organized entryway you have expertly crafted with your own two hands.