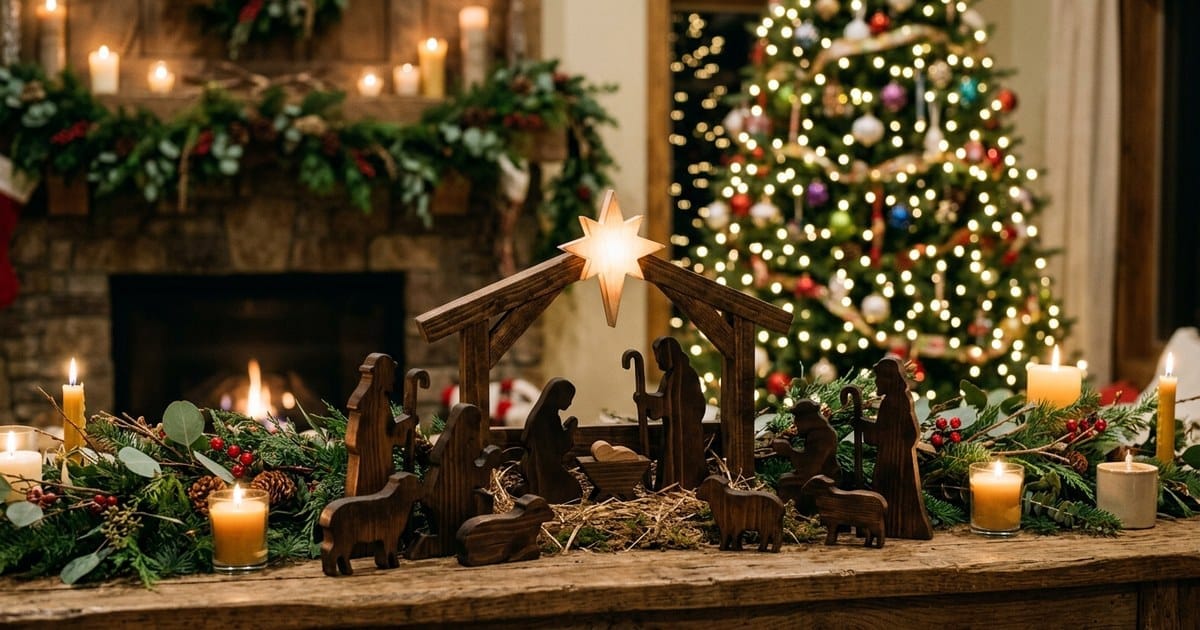
10 Stunning Wooden Nativity Scene Plans for a Meaningful Christmas
A wooden nativity set becomes the heart of Christmas decorating — the piece your family unpacks first every December. These ten wooden nativity scene plans let you hand-build that tradition instead of buying plastic, and most take just a weekend.
You’ll find everything from a simple scroll-saw silhouette set to a life-size yard display below. The smell of fresh sawdust beats any store receipt. Each of these wooden nativity scene plans lists the difficulty, time, and materials up front so you can pick the build that fits your shop. Free patterns for many of these styles circulate on Instructables and Hometalk, and our easy Christmas woodworking projects roundup pairs well with every one of them.
1. Classic Silhouette Nativity Set
The silhouette set is the most iconic of all wooden nativity scene plans — Mary, Joseph, baby Jesus, shepherds, and wise men cut as flat profile shapes. Trace a printed pattern onto ½-inch plywood and cut it with a scroll saw or jigsaw.
Stain the figures dark walnut or paint them matte black so they read as a single elegant group. A small string of white lights behind the set turns it into the focal point of your mantel instantly. Swap the sheep and donkey poses to make the scene your own, and save the cutoffs for ornament blanks.
- Difficulty: Beginner
- Time to build: 3–4 hours
- Materials: ½-inch plywood, printed silhouette pattern, scroll saw, stain or paint

Alt text: dark stained wooden silhouette nativity set arranged on a fireplace mantel
2. Rustic Barnwood Stable
Sometimes the holy family figurines already exist and what you need is the stable itself. This plan builds the classic creche shelter from reclaimed fence boards, complete with a peaked roof and scrap-wood star.
Leave the boards weathered and rough — the silvery gray patina is the whole charm of this build. It frames any figurine set beautifully and stores flat if you dowel the joints instead of gluing them. If you only try one of these wooden nativity scene plans this year, make it this timeless stable.
- Difficulty: Beginner
- Time to build: 2–3 hours
- Materials: reclaimed fence boards, 2-inch brad nails, scrap dowels, wood glue

Alt text: rustic nativity stable built from weathered reclaimed barnwood on a farmhouse table
3. Chunky 2×4 Block Nativity
These painted block figures are the friendliest wooden nativity scene plans for families with small children. Cut 2×4 lumber into graduated rectangles, round the top corners, and you have a toddler-proof nativity.
Paint on simple face dots and robe shapes, or let the kids decorate their own set with acrylics. A strip of fabric glued as a headscarf adds texture without any carving skill. Store the finished blocks in a cotton bag and they will survive decades of toddler Christmases.
- Difficulty: Beginner
- Time to build: 1–2 hours
- Materials: 2×4 lumber cutoffs, acrylic craft paint, fabric scraps, sandpaper

Alt text: colorful painted 2×4 wooden block nativity figures lined up on a table
4. Puzzle-Piece Plywood Nativity
This clever plan cuts the entire nativity from a single board like a jigsaw puzzle. Each figure nests inside the next, so one 12×12-inch piece of plywood yields the whole holy family plus animals.
Use a fine scroll saw blade and follow the grain so the pieces lift out cleanly. It’s one of those wooden nativity scene plans that also packs flat for storage — a big win for small homes. Sand every edge silky smooth, because small hands always find the rough spots.
- Difficulty: Intermediate
- Time to build: 4–5 hours
- Materials: 12×12-inch plywood panel, scroll saw pattern, fine blades, clear finish

Alt text: interlocking natural plywood nativity figures cut like puzzle pieces from one board
5. Peg Doll Nativity Set
Wooden peg dolls turn into a charming hand-painted nativity with almost no cutting required. Order a bag of hardwood peg dolls in assorted sizes and the “woodworking” is mostly painting and gluing felt robes.
Arrange the finished figures in a shallow wood tray with excelsior straw for the manger look. Sets like this sell fast at craft fairs — see our Christmas projects to sell list for pricing ideas. Of all the wooden nativity scene plans in this guide, this one is the safest pick for painting with kids. Seal the paint with clear wax so the colors survive years of handling.
- Difficulty: Beginner
- Time to build: 2–3 hours
- Materials: hardwood peg dolls, acrylic paint, felt, wood tray, hot glue

Alt text: hand-painted wooden peg doll nativity figures standing in a wooden tray
6. Shadow Box Nativity Scene
A deep picture frame becomes a miniature Bethlehem with this layered shadow box plan. Cut three silhouette layers — hills, stable, and star — and space them inside the frame for real depth.
Add a single warm LED behind the star layer and the whole scene glows softly at night. This is one of the most giftable wooden nativity scene plans because it hangs flat on the wall like art. Keep the frame’s original glass in place and the piece shrugs off decades of December dust.
- Difficulty: Intermediate
- Time to build: 3–4 hours
- Materials: deep shadow box frame, thin plywood layers, LED tea light, black paint

Alt text: layered wooden shadow box nativity scene with a softly glowing star light
7. Outdoor Life-Size Yard Nativity
Go big with a life-size silhouette set that tells the Christmas story to the whole street. Cut the figures from ¾-inch exterior plywood, from 4-foot-tall shepherds down to the manger at ground level.
Prime and paint in flat colors or classic black, screw stakes to the backs, and light them with a small spotlight. Lighting matters most in wooden nativity scene plans meant for the yard — one warm LED spotlight is plenty. Check local rules before anchoring anything tall near the sidewalk. It belongs on the same lawn as our other outdoor Christmas woodworking projects.
- Difficulty: Intermediate
- Time to build: one full weekend
- Materials: ¾-inch exterior plywood, jigsaw, exterior primer and paint, ground stakes

Alt text: life-size wooden nativity silhouette display lit up in a snowy front yard
8. Intarsia-Style Nativity Wall Plaque
Intarsia uses the wood’s natural tones instead of paint to shade each figure. Walnut for the robes, maple for faces, cherry for the star — glued onto a plywood backer, it becomes gallery-worthy wall art.
If you’re newer to the craft, start with only the holy family in 8–10 pieces. Our Christmas woodworking for beginners guide covers the scroll saw basics this plan builds on. It is the most advanced of these wooden nativity scene plans, but the result is heirloom art for your wall.
- Difficulty: Advanced
- Time to build: 2 weekends
- Materials: walnut, maple, and cherry stock, plywood backer, scroll saw, glue, mineral oil

Alt text: intarsia-style wooden nativity wall plaque made of rich natural wood tones
9. Minimalist Mantel Nativity
Not every build needs carving. This minimalist plan suggests the whole scene with three simple shapes — an A-frame stable, a small star, and a tiny manger block — cut from one 1×6 board.
Sand everything smooth and finish in natural oil for a clean Scandinavian look. Among these wooden nativity scene plans, it’s the fastest to batch-build, so it also makes a thoughtful neighbor gift. A battery tea light placed behind the manger throws long soft shadows across the mantel.
- Difficulty: Beginner
- Time to build: 1 hour
- Materials: 1×6 pine board, wood glue, mineral oil, optional tea light

Alt text: minimalist natural wood nativity set styled on a modern fireplace mantel
10. Wood Slice Nativity Ornaments
Turn downed branches into a whole nativity ornament set for the tree. Cut ¼-inch slices from a 3-inch branch, then woodburn or paint the simple figure silhouettes inside a round stable outline.
Drill a small hole, add twine, and each slice becomes a tree ornament or gift tag. Ten slices make a complete story set that costs almost nothing but a few evenings at the bench. It’s the smallest of these wooden nativity scene plans and the easiest to mail to family far away.
- Difficulty: Beginner
- Time to build: 2 hours
- Materials: tree branch slices, woodburning tool or paint pen, twine, clear sealant

Alt text: wood slice nativity ornaments with twine hangers on a Christmas tree branch
Conclusion: Choose the Wooden Nativity Scene Plans That Fit Your Shop
Mass-produced nativity sets come and go, but a set you build gets handed down. These ten wooden nativity scene plans range from a one-hour mantel build to a full weekend intarsia plaque, so there’s a starting point for every skill level.
Pick one this week — December always arrives faster than expected. Batch-build two sets and keep one for your own mantel. For thousands of printable full-size patterns, check out Ted’s Woodworking plans; our honest Ted’s Woodworking review covers what you’ll find inside. Then browse more holiday builds like our Christmas wood decor ideas, and subscribe on the Home Decor Woodworking homepage so you never miss new wooden nativity scene plans and Christmas projects.
Affiliate Disclosure: This post contains affiliate links. If you purchase through these links, we may earn a small commission at no additional cost to you. We only recommend products we genuinely believe will help your woodworking journey.