
The first river table I ever poured is still in my garage — not as furniture, but as a reminder. I mixed the epoxy in a hurry, ignored the temperature on the can (“it’ll be fine,” I told myself), poured a full two-inch river in one go, and woke up to a tabletop full of bubbles, a sticky centre that never cured, and a “river” the colour of old tea instead of the deep blue I’d imagined. Expensive lesson, free education: epoxy is chemistry, not glue, and chemistry does not care about your weekend plans.
The good news? River tables look far more complicated than they actually are. With the right slabs, a simple mold, a scale and a clean workspace, a first-timer can build one of the most striking pieces of furniture in their home — as long as they follow the process in order and give the resin the respect it asks for. This guide walks you through the whole build the way I wish someone had walked me through mine: what to buy, how to prepare the wood, how to build a leak-proof mold, how to mix and pour without bubbles, and how to flatten and finish the top so it looks like it cost five times what you paid.
What is an epoxy river table (and why do they cost so much)?

A river table is two (or more) live-edge wood slabs — usually walnut, oak or a locally sourced hardwood — separated by a gap that is filled with clear or tinted casting epoxy. When the resin cures, it looks like a frozen river running through the wood, which is where the name comes from. Retail river tables sell for eye-watering prices because they combine expensive slabs, a lot of epoxy, skilled flattening and weeks of labour. Building your own typically costs a fraction of that — but it is still a real materials budget, not a cheap afternoon craft, so it pays to read this whole guide before you buy anything.
Before you start: an honest cost and commitment check
I will not sugar-coat it: epoxy is the most expensive part of the build, and it is unforgiving when wasted. Before you commit to a full table, here is the honest checklist:
- Time. A real river table is a multi-week project: days for the slabs to acclimatise, a day to build and seal the mold, a day per pour, a week of curing, then a full day of flattening and finishing. There are no shortcuts that end well.
- Space and temperature. You need a clean, level, dust-controlled space at a stable 21–24°C (70–75°F). Cold garages cause bubbles and sticky patches — exactly how my first pour died.
- Safety gear. Nitrile gloves, safety glasses and good ventilation are non-negotiable. Epoxies are skin sensitisers — once you become sensitised, every later exposure gets worse.
- Money. Budget for quality deep-pour epoxy (the “2:1” casting resins meant for pours thicker than 3 mm), the slabs, mold materials and a sander or router sled. Buy epoxy from a supplier with good instructions rather than the cheapest listing online.
If that checklist makes you hesitate, do yourself a favour and start with an epoxy coaster or cheese board using offcuts — the technique is identical, the risk is tiny, and you will learn your resin’s personality for the price of one small pour. This guide assumes you are ready for the full table, but every step applies to the small version too.
Tools and materials: the complete list
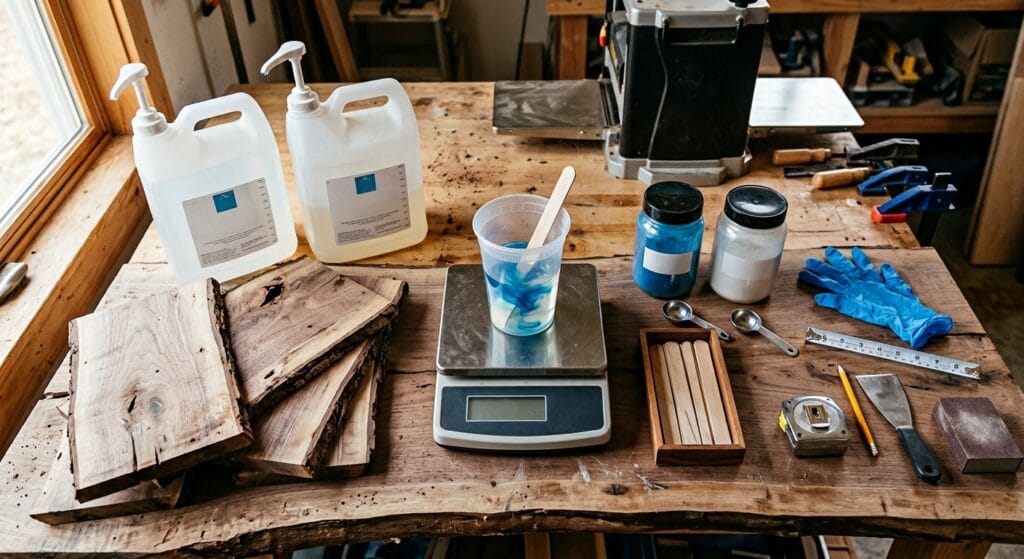
Here is everything I use for a river table build, split by purpose:
- Wood: two live-edge slabs, kiln-dried, roughly 4–5 cm thick, with straight, stable edges you like. (More on choosing them below.)
- Epoxy: a deep-pour casting epoxy rated for at least 5 cm pours, in a 2:1 resin-to-hardener ratio. Buy 10–15% extra for waste and test pours.
- Pigment: transparent liquid tints or mica powders — a little goes a long way. Black, deep blue and white are the classic river colours.
- Mold: melamine-faced board or thick PVC for the walls, silicone sealant, and a roll of packing tape or clear tape for the inside faces.
- Sealing: a small amount of the same epoxy (for the edge seal coat) or shellac, plus painter’s tape.
- Mixing: a precise digital kitchen scale, graduated mixing cups, stir sticks, and a heat gun or kitchen torch for bubbles.
- Flattening: a router with a surfacing bit and a level sled — or access to a drum sander/planer at a local workshop.
- Finishing: sandpaper from 80 to 400 grit, a sanding block or orbital sander, and a wipe-on oil or matte polyurethane.
- Safety: nitrile gloves, safety glasses, a respirator rated for organic vapours (not just a dust mask) and good ventilation.
Step 1: Choose and prepare your slabs
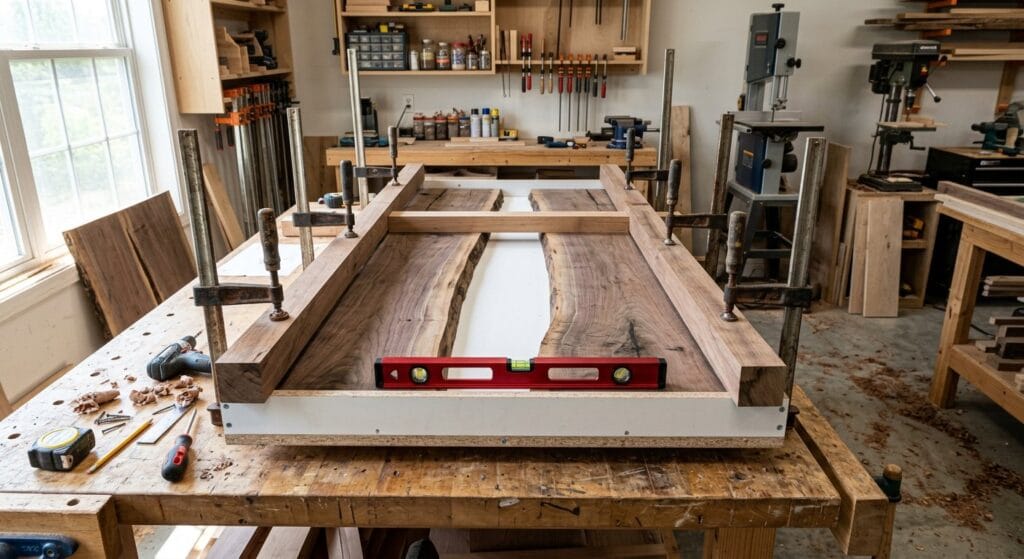
The wood does more work than the epoxy in a river table — it is what people notice first. Choose kiln-dried live-edge slabs that are flat, dry and free of cracks running end to end. A little character (a knot, a mineral streak) is a feature; a checked end or a deep split is a future headache. If you are new to buying lumber, my guide to choosing the right wood covers what to look for at the yard, and preventing warping and cracking explains why slabs must acclimatise in your workshop for several days before you build — solid wood moves, and epoxy will hold whatever shape the wood arrives in.
Arrange the slabs on a flat surface with the live edges facing each other, and decide on the gap: 8–12 cm (3–5 inches) is the classic river. Too narrow and it reads as a crack filled with resin; too wide and you double your epoxy bill for no extra beauty.
Step 2: Build a leak-proof mold
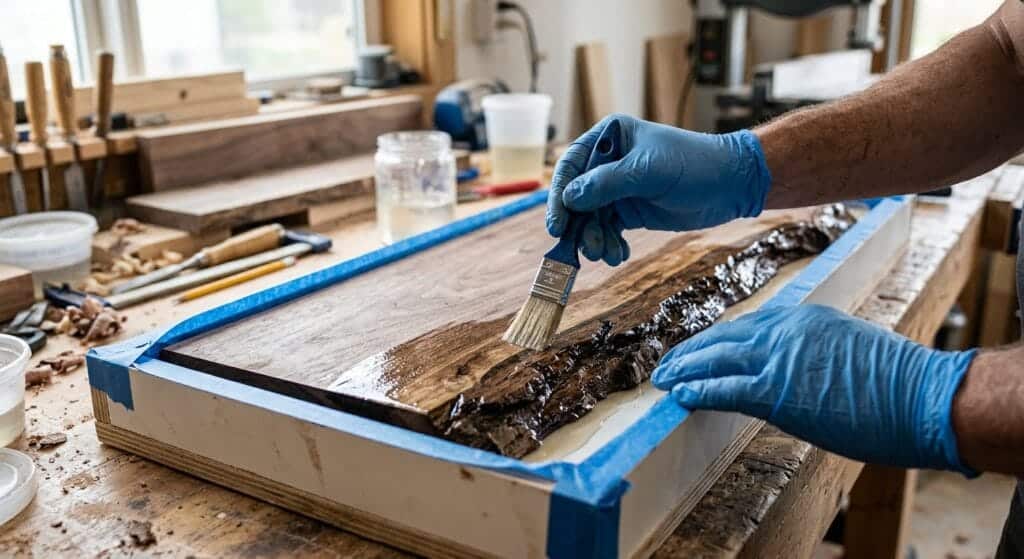
Your mold is a shallow tray: melamine or PVC walls screwed to a flat base, with the slabs sitting inside and the river gap in the middle. Three details decide success:
- Level the base first. Shim the whole mold until a spirit level reads perfectly flat in both directions. Epoxy is a liquid for hours — it finds its own level, and if the mold is off, the whole tabletop will be.
- Seal every seam. Run a bead of silicone sealant along every inside corner and let it cure before you pour. Then cover the inside faces with clear packing tape so cured epoxy releases cleanly from the walls.
- Caul the slabs. Screw temporary cross-pieces (cauls) across the top of the slabs to keep them from floating or shifting when the heavy liquid epoxy pushes against them.
Leaks are the beginner’s classic disaster — epoxy finds gaps you did not know existed, and it cures wherever it lands. Test the mold with a cup of water for an hour before you mix anything.
Step 3: Seal the wood edges first
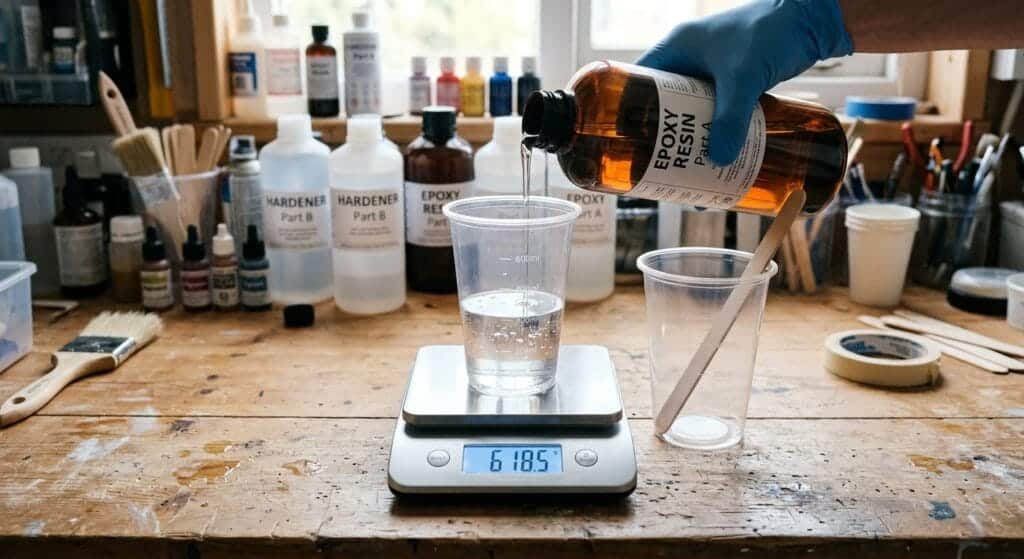
This is the step almost every tutorial skips, and it is the one that separates crisp rivers from muddy ones. Raw live-edge wood is full of pores and tiny cracks that bleed air and natural resin into your pour — causing bubbles along the edge and an ugly amber halo around the “river.” The fix is a seal coat: brush a thin layer of mixed epoxy (or shellac) onto the live edges and any end grain, let it cure, then lightly sand it to 220. The sealed edge keeps the deep pour clean, bubble-free and crystal clear.
Step 4: Mix epoxy like a chemist
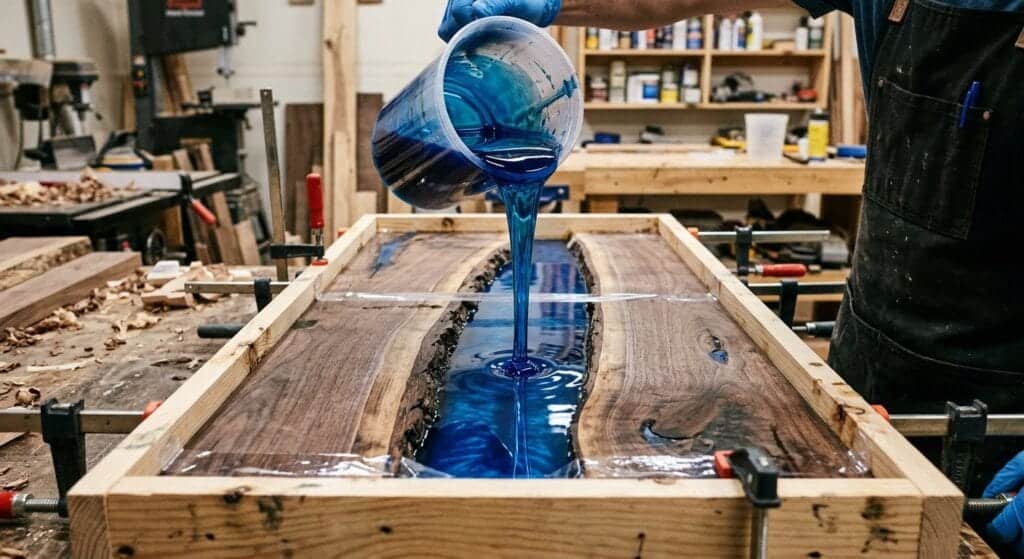
Read the can’s instructions three times, then mix by weight, not volume: most deep-pour systems are 2 parts resin to 1 part hardener by weight, and even a 10% error means a pour that never cures properly. Use a digital scale, mix in one cup and pour into a second cup (the “double-cup” method avoids the unmixed residue stuck to the first cup’s walls), and stir slowly for a full two to three minutes, scraping the bottom and corners. Fast, vigorous stirring whips air in — slow and thorough is the goal.
Temperature is half the recipe. Warm the resin bottles in a hot-water bath if your workspace is cool, and never pour below the minimum temperature printed on the label. My ruined first table taught me that a “slightly cold” garage is a fully ruined pour.
Step 5: Tint and pour in layers
Add pigment to the mixed epoxy a few drops at a time — you can always add more, but you cannot remove it. For a deep, translucent river colour, transparent tints beat opaque mica (which can hide the wood’s reflection and settle into streaks). Mix pigment in thoroughly, then pour in a single steady stream into the lowest point of the river gap, letting the epoxy find its own level.
Here is the rule that protects your bank account: most deep-pour epoxies are only rated for pours of 2–5 cm per layer, depending on the brand. If your river is deeper than the rated maximum, pour it in two or three layers, letting each one cure before the next. Pouring 8 cm in one shot generates so much heat it can smoke, crack and yellow — that is the fastest way to ruin a beautiful table.
Step 6: Degas, then wait (do not touch it)
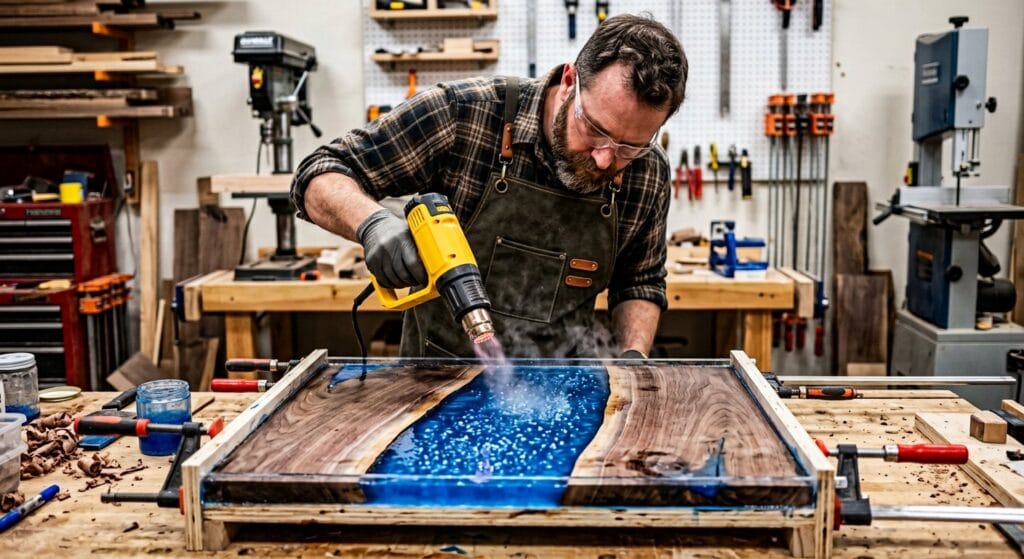
Within the first 15–30 minutes, pass a heat gun or torch slowly over the surface to pop the bubbles that rise from the wood and the pour itself. Keep the heat moving — lingering in one spot cooks the resin and creates waves. Repeat once or twice as new bubbles surface, then stop: the epoxy now needs to cure undisturbed. Cover the mold loosely to keep out dust, and wait the full cure time the can specifies — usually 24 hours to demold and 5–7 days before machining or sanding. Touching it early leaves fingerprints that no amount of sanding fully removes.
Step 7: Flatten the cured top
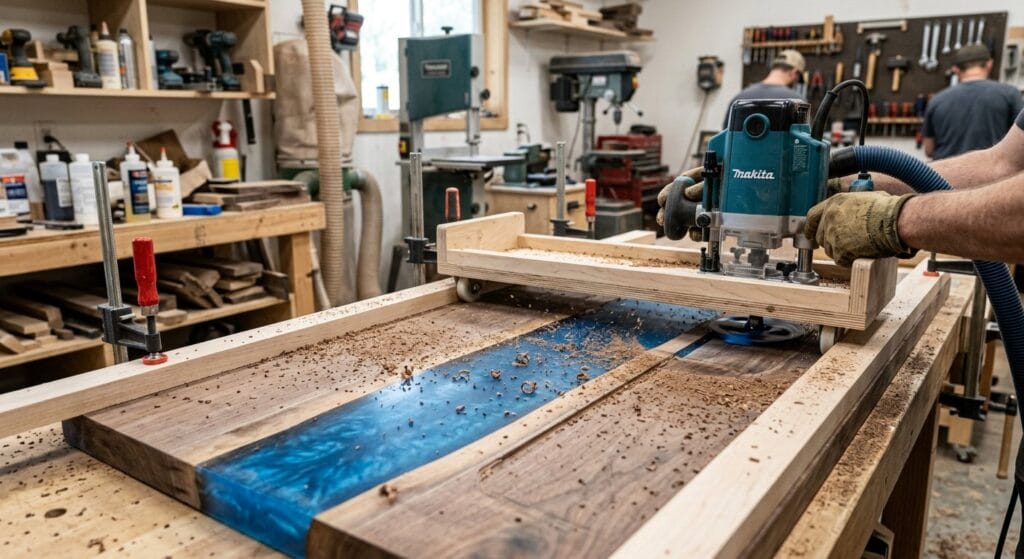
Cured epoxy shrinks a little, so the surface will not be perfectly flat — the top needs flattening before it can be a table. The DIY-standard method is a router sled: two level rails, a router with a large surfacing bit, and slow passes across the whole top until the wood and epoxy are one flat plane. If you do not own a sled, most local workshops will run a tabletop through a drum sander for a modest fee — honestly, for a first table that is the smarter choice.
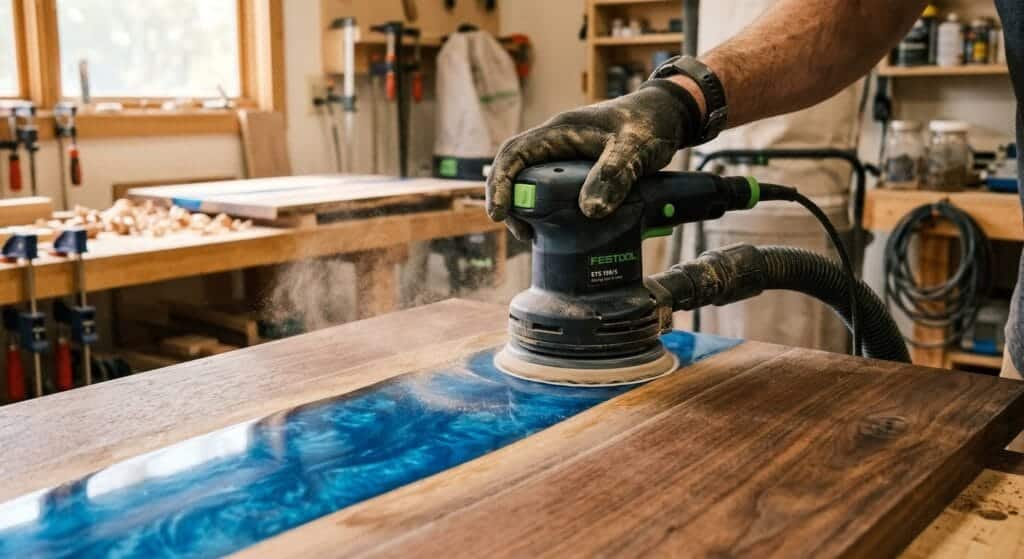
Once flat, sand from 120 up through 220, 320 and finally 400 grit, cleaning between grits. Epoxy sands faster than wood, so keep the sander moving evenly or you will carve low spots in the river. My sanding and finishing guide explains the full grit progression if you want the silky result done right. A random orbital sander is the tool for this job; if you are kitting out a workshop from scratch, start with the twelve essentials in my woodworking tools for beginners guide.
Step 8: Finish and protect
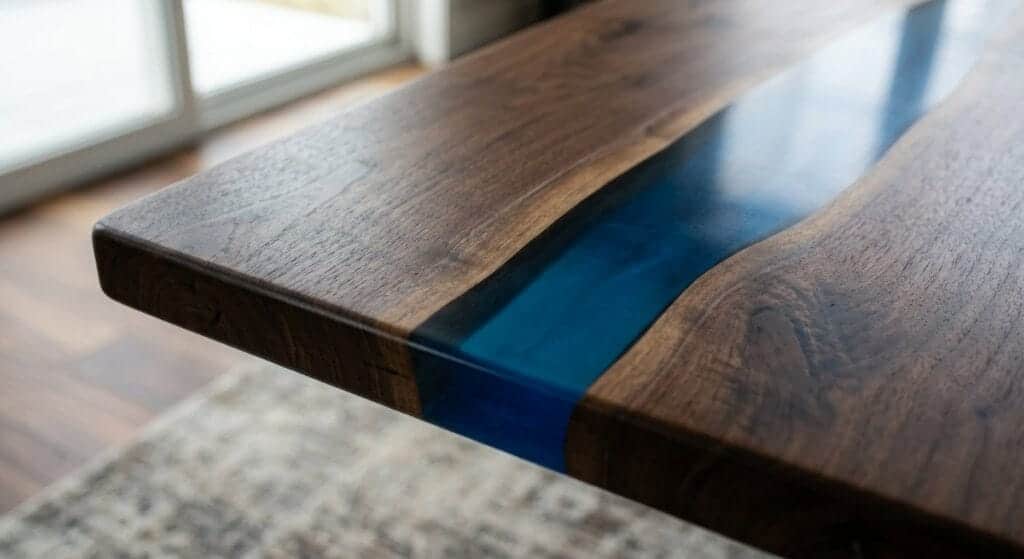
Epoxy itself is glossy and waterproof, but the wood needs protection, and a finish unifies the whole top. My preference for river tables is two or three coats of matte or satin wipe-on polyurethane, or a quality furniture oil — it protects the wood, tames the epoxy’s glassy shine into something elegant, and is easy to repair later. Apply thin coats with a lint-free cloth or foam brush, sanding lightly with 320 between coats. If you want the full glassy “showroom” look instead, skip the oil and wet-sand the cured epoxy to 2000+ grit followed by a plastic polish — but be warned, that route is hours of extra work for a shine that fingerprints instantly.
Common mistakes (and the fixes)
- Bubbles everywhere. The room was too cold, the resin was stirred too hard, or you skipped the seal coat on the wood. Fix: warm the resin, stir slowly, seal the edges, and degas with a torch after pouring.
- Sticky spots that never cure. Wrong mix ratio or cold temperatures. Fix: mix by weight on a scale, and check the minimum temperature on the label.
- Amber or yellow “halo” around the river. You did not seal the live edges before the deep pour. Fix: seal coat with epoxy or shellac first — the only true cure is a redo.
- Epoxy leaked under the slab. The mold was not sealed. Fix: silicone every seam, tape the faces, and water-test before mixing.
- Wavy or uneven top. The mold base was not level. Fix: shim until perfectly level before the first pour; flatten afterwards with a router sled.
- Cloudy or milky river. Moisture in the wood or the room. Fix: kiln-dried slabs, dry workspace, and never pour over damp wood.
Almost every river-table disaster happens in the first 24 hours of the build — preparation, mixing and pouring. Get those right and the rest is just sanding and patience.
River table FAQ
Is epoxy safe to use indoors? Liquid epoxy is safe when handled correctly — wear nitrile gloves and eye protection, work in a ventilated area, and use a respirator rated for organic vapours while mixing and pouring. Once fully cured, epoxy is inert and food-safe-grade epoxy is available for cutting boards.
How much epoxy do I need? Multiply your river’s length × width × depth to get the volume, then add 10–15% for waste and test pours. Most tables use several litres; your supplier’s calculator is your friend.
Can I pour the river in one go? Only if the deepest point is within your epoxy’s rated single-pour depth (usually 2–5 cm). Deeper rivers need two or three layers poured on separate days.
Do I need live-edge wood? No — square-edged boards with a narrow gap make a beautiful “ribbon” table too, and they are easier to seal and flatten. Live edge just gives you the classic river look.
Why is my table yellowing? All epoxies amber slightly over time, especially in sunlight; cheaper resins yellow faster. Buy a UV-stabilised casting epoxy if the table will live near a window, and keep the pours as thin as the design allows.
How long before I can use the table? Demold after about 24 hours, flatten after the full cure (5–7 days), and let your finish cure another few days before putting heavy objects on it. A river table gets stronger for about two weeks after the pour.
About the author and this guide
I’m Saurav Samanta, a home-decor woodworking enthusiast who has built and documented dozens of projects — from furniture to garden structures — for this site. Every step above comes from pours I have made myself, including the sticky garage table that taught me to respect temperature and ratios. Epoxy is serious chemistry: always wear nitrile gloves and eye protection, ventilate your workspace, follow the product’s safety data sheet, and keep epoxy away from children and pets. Spotted an error? Report it here and I’ll fix it.
Ready to build? Start with these
If the full table feels like a big first step, practise the exact same skills on a small piece: an epoxy coaster or cheese board from scrap wood teaches you mixing, sealing and pouring for the price of a single cup of resin. When you are ready to plan the real build, my woodworking plans guide helps you turn measurements into a cut list, the sanding and finishing guide will get the top silky, and the easy furniture projects roundup has ten more pieces for your new workshop. Measure twice, seal the edges, and let it cure — that is the whole secret.