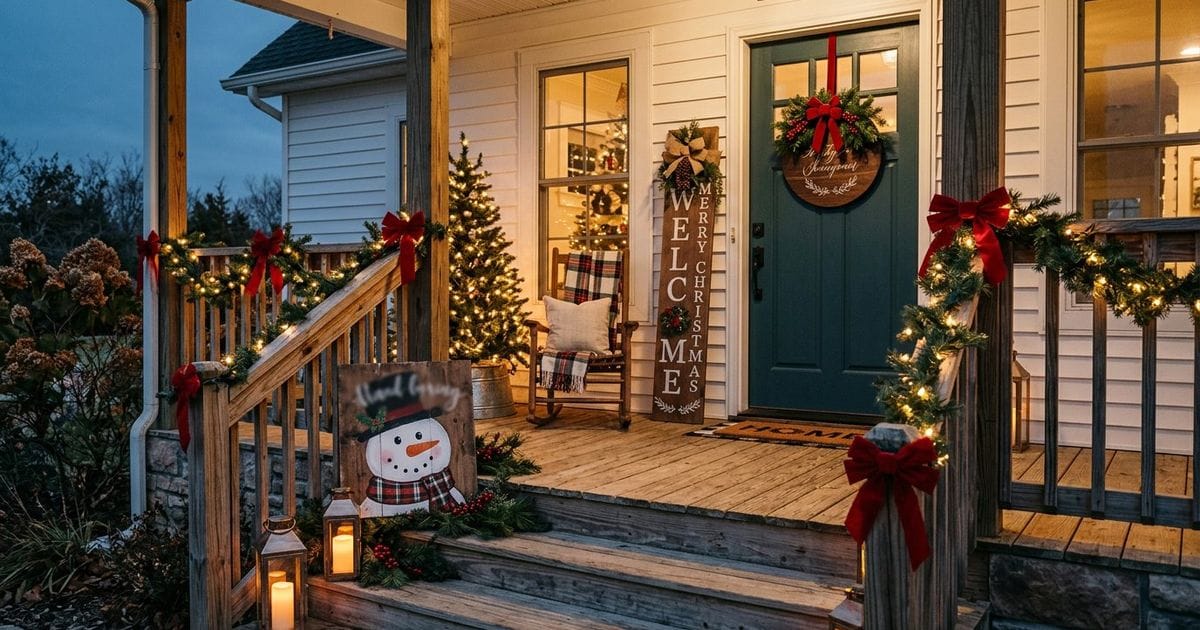
10 Rustic Christmas Porch Signs to DIY This Holiday Season
Your porch is the first thing guests see and the last thing they remember — and a handmade wooden sign makes that welcome unforgettable. Store-bought signs can’t match the charm of weathered boards, hand-painted lettering, and a perfectly imperfect distressing job. These 10 DIY Christmas porch signs cover every style, from tall classic leaners to playful snowman faces, and every skill level from “never held a brush” to confidant crafternooner. Each project includes lettering shortcuts (stencils, carbon paper transfers, and vinyl tricks), so beautiful typography is guaranteed even if your handwriting is hopeless. Most signs build in a single afternoon for under $15, and with exterior paint plus a clear sealer, they’ll greet visitors for many Decembers to come. Let’s make your porch merrier, one board at a time.
1. Classic “Merry Christmas” Porch Leaner
The tall vertical leaner is the undisputed king of rustic Christmas porch signs. Build a 5 to 6 foot panel from three fence pickets or a single 1×8, then letter “MERRY” stacked above “CHRISTMAS” in a bold condensed font — vertical stacking is what makes leaners look professional. White letters on a red background reads from the street; natural wood with dark walnut lettering suits farmhouse porches. Stencil it, or print letters on paper and trace with carbon paper for crisp edges. Finish with light edge distressing and a clear exterior sealer, then lean it beside the door at a slight angle.
- Difficulty: Beginner
- Time to build: About 2 hours, plus paint drying
- Materials: Fence pickets or 1×8 board, exterior paint in background and letter colors, stencils or printed template, sandpaper, clear exterior sealer

Alt text: “Tall Merry Christmas porch leaner, classic DIY Christmas porch sign with stacked lettering.”
2. Reversible Two-Season Sign
Why store a sign when it can flip? Put fall’s “Gather” or “Thankful” on one side and winter’s “Let It Snow” on the other, and one board covers September through February. Build a standard rectangular panel and paint each side in its own seasonal palette — burnt orange tones for autumn, crisp navy or red for winter. Because both designs live on one sign, layout matters: keep lettering centered with generous margins so neither season feels cramped. A simple cleat on the porch wall or a leaning spot beside the door both work. This is the project friends always ask about, because it’s clever and clearly costs almost nothing.
- Difficulty: Beginner
- Time to build: About 2.5 hours for both sides
- Materials: 1×10 or joined pickets panel, exterior paints in two seasonal schemes, stencils, painter’s tape, clear sealer

Alt text: “Reversible two-season porch sign, smart wooden Christmas sign that works fall and winter.”
3. Buffalo Plaid “Believe” Sign
Buffalo plaid is the unofficial fabric of a farmhouse Christmas, and painting it is easier than it looks. Cover your panel in white, tape off 2-inch stripes horizontally and paint them gray, then repeat vertically with red — the overlapping squares create the plaid automatically. Peel the tape and you’ll feel like a magician. Letter “BELIEVE,” “NOEL,” or “JOY” across the center in crisp white or black script. The bold background reads beautifully from the street, and the sign pairs perfectly with plaid bows elsewhere on the porch. Use a foam roller for even coats and skip perfection — slightly feathered edges enhance the rustic vibe.
- Difficulty: Beginner
- Time to build: About 2 hours, plus drying between coats
- Materials: 1×12 or joined-panel board, exterior paint (white, gray, red, plus lettering color), 2-inch painter’s tape, foam rollers, letter stencil, clear sealer

Alt text: “Buffalo plaid Believe porch sign, trendy farmhouse Christmas porch decor to DIY.”
4. Framed “Home for the Holidays” Farmhouse Sign
A simple frame takes a painted panel from craft project to decor piece. Build your background from two or three wide boards, paint a soft greige or white, and letter the phrase “Home for the Holidays” in mixed fonts — block caps for “Home,” flowing script for the rest. Then miter or butt-join four stained 1x2s around the edges. The contrast of light background and dark stained frame is the farmhouse signature. Add a tiny painted wreath or pine sprig detail in one corner for charm. Hang with a French cleat for a flush, professional mount that winter wind can’t rattle.
- Difficulty: Beginner to intermediate
- Time to build: About 2.5 hours
- Materials: 1×8 or 1×10 boards, 1×2 frame trim, exterior paint, letter stencils in two fonts, wood stain, brad nails, French cleat, clear sealer

Alt text: “Framed farmhouse Home for the Holidays sign, elegant DIY Christmas porch sign with stained frame.”
5. Round Welcome Sign with Wreath Accent
Round signs are everywhere right now, and Christmas is their moment. Cut an 18-inch circle from plywood or glue-up pine rounds, stain or paint it, and letter “WELCOME” around “Merry Christmas” or a simple “Noel” at the center. The magic touch is a small fresh wreath or half-swag of pine attached to the top or bottom edge, turning the sign into a door-wreath hybrid. Hang it on the front door with a wide ribbon, or stand it on a porch bench flanked by lanterns. If cutting a perfect circle worries you, trace a large planter lid or restaurant pizza pan as your template.
- Difficulty: Beginner
- Time to build: About 1.5 hours
- Materials: 18-inch plywood circle or glued pine round, jigsaw, paint or stain, vinyl letters or stencil, small fresh wreath or pine clippings, floral wire, wide ribbon for hanging

Alt text: “Round welcome sign with wreath accent, modern Christmas welcome sign DIY for the front door.”
6. Snowman Face Square Sign
Equal parts adorable and effortless, the snowman face sign is a guaranteed smile-maker. Paint a 16 to 20 inch square panel white, then add two coal eyes, a smile of black dots, and a long orange carrot nose — slight asymmetry makes him cuter, not worse. Finish with a buffalo plaid bow stapled at the top corner and a painted dusting of rosy cheeks. Kids adore this project, and it’s a wonderful first paint project for total beginners because there are no letters to stress over. Lean him on the porch steps or hang him at child height where he can greet your smallest visitors.
- Difficulty: Beginner
- Time to build: About 1 hour
- Materials: Plywood or pine panel (16–20 inches square), white exterior paint, black and orange craft paint, round sponge daubers optional, plaid ribbon, staple gun, clear sealer

Alt text: “Snowman face square sign, cute and easy DIY Christmas porch sign for beginners.”
7. “Let It Snow” Three-Panel Triptych
One word per board — “LET,” “IT,” “SNOW” — hung as a vertical set makes a graphic statement that looks far fancier than the effort involved. Cut three equal panels from a 1×6, paint each the same background, and letter one word per panel in a tall bold font. Hang them with small gaps so the phrase reads clearly, or connect the backs with a shared French cleat strip for even spacing. Alternate red and white lettering on a dark green background for a vintage-candy look, or keep everything white-on-stain for Scandinavian calm. Snowflake accents between panels tie the set together.
- Difficulty: Beginner
- Time to build: About 2 hours
- Materials: 1×6 board cut in three panels, exterior paint, tall letter stencils, small snowflake stencil, French cleat strips, clear sealer

Alt text: “Let It Snow three-panel sign, graphic rustic Christmas porch sign trio.”
8. Vintage “North Pole Co.” Sign
Channel an old general-store advertisement with a weathered “North Pole Co. — Est. 1825” style sign. The aged look comes from technique, not luck: paint your base color, dry-brush a second color over the raised grain, then sand letters lightly after painting so the wood peeks through in all the “right old places.” An antique white on barn red combo feels authentically vintage, and small painted details like a compass star or pine bough complete the story. Letter in mixed sizes the way old signs did — big name on top, smaller tagline below. This sign photographs beautifully, which makes it a strong candidate if you ever sell at craft fairs.
- Difficulty: Intermediate
- Time to build: About 3 hours with distressing
- Materials: Weathered boards or new 1×12, two or three exterior paint colors, stencils, dry brush, sandpaper for distressing, antiquing wax optional, clear sealer

Alt text: “Vintage North Pole Co sign with distressed paint, character-rich wooden Christmas sign.”
9. No-Paint Wood-Burned Welcome Sign
Not everyone loves painting — this sign needs none. Choose a beautiful board (cedar’s grain is gorgeous), and burn your greeting directly into the wood with a pyrography pen: “Welcome,” “Joy,” or “Merry & Bright” in flowing script, framed with a simple burned border line. The roasted lettering is permanent, weatherproof by nature, and looks richly handcrafted. Finish with a coat of outdoor oil to deepen the tone, and hang with rope through two drilled holes for cabin character. First time burning? Practice strokes on a scrap first — slow, steady tips make the cleanest lines.
- Difficulty: Beginner to intermediate
- Time to build: About 1.5 hours
- Materials: Cedar or pine board, wood-burning pen, pencil for layout, sandpaper, outdoor oil finish, rope for hanging, drill

Alt text: “Wood-burned welcome sign on cedar, paint-free rustic Christmas porch sign with rope hanger.”
10. Two-Sided A-Frame Porch Sign
Close the list with the workhorse of porch decor: a folding A-frame sign that greets from both directions. Build two identical panels, hinge them at the top with a support chain between, and letter each side differently — “Merry Christmas” facing the street and “Come On In” facing the door is a crowd-pleasing combo. The freestanding design means no mounting, no wall marks, and instant repositioning for photos and parties. Add rubber feet so winter water doesn’t wick into the end grain. It’s also the most giftable sign on this list; who wouldn’t love to unwrap one?
- Difficulty: Beginner to intermediate
- Time to build: About 2.5 hours
- Materials: Two panels (1×8 or plywood), butt hinges, short chain with eye screws, exterior paint, stencils, rubber feet, clear sealer

Alt text: “Two-sided A-frame porch sign, freestanding DIY Christmas porch sign for entryways.”
The Ted’s Woodworking plans library includes A-frame dimensions and hinge placement guides — handy if you want to batch these as gifts.
Conclusion
One afternoon, one board, and your porch transforms from ordinary to unforgettable. These 10 DIY Christmas porch signs prove that big holiday curb appeal doesn’t require big budgets or advanced skills — just paint, a brush, and a little patience between coats. Pick the style that fits your home, use the lettering shortcuts in each project, and don’t stress perfection: rustic means gloriously, charmingly imperfect. When December winds down, slide your creation into the garage and it’ll greet next year’s guests just as warmly. Ready for your next build? Browse the Ted’s Woodworking plans collection for sign templates, lettering layouts, and hundreds of seasonal projects. And subscribe to the Home Decor Woodworking newsletter for fresh plans all year long. Merry Christmas — and enjoy every compliment your new sign earns!
Affiliate Disclosure: This post contains affiliate links. If you purchase through these links, we may earn a small commission at no extra cost to you. We only recommend products we trust and believe will benefit our readers.