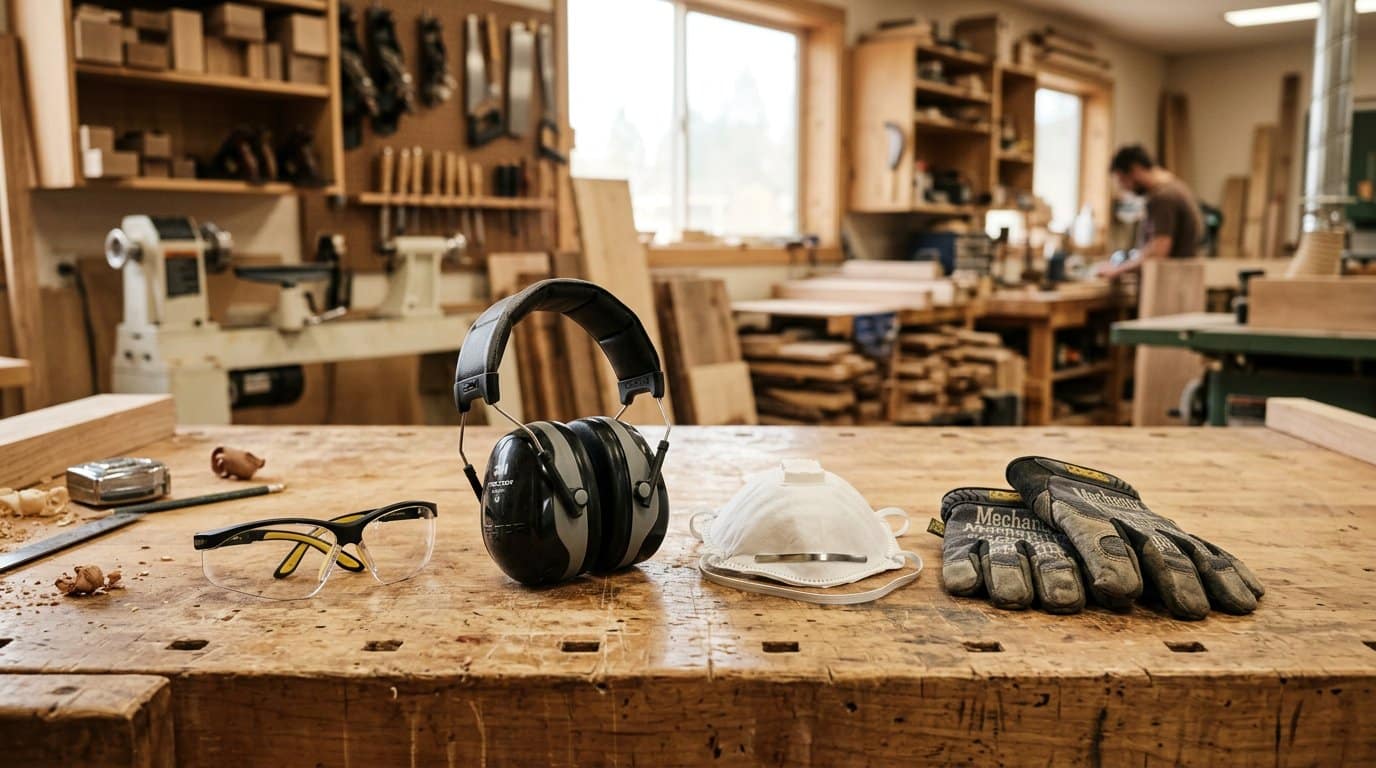
Every woodworker I know has a story about the moment a tool reminded them who is in charge — a kickback that dented a garage door, a chisel that slipped and found a thumb, a week of coughing after a sanding session with no mask. Most of those moments were preventable with habits that cost nothing. This guide is the safety briefing I give every beginner before they plug anything in: the ten rules that actually prevent injuries, plus the specifics behind dust, kickback, hearing and chemicals that most “safety tips” lists skip.
Quick answer: wear ANSI-rated safety glasses every time a blade spins, hearing protection for any power tool over ~85 dB (that is nearly all of them), and an N95 respirator minimum for dust — P100 for hardwoods. Never remove a saw’s guard, riving knife or anti-kickback pawls; stand to the side of the blade, never behind it; use a push stick for any cut where your fingers come within 6 inches of the blade; clamp every workpiece; unplug before changing blades; and never work tired, rushed or distracted. Sharp tools, a clean floor and a first-aid kit within reach finish the list.

The ten rules that prevent almost every injury
- Eyes first. ANSI Z87.1-rated safety glasses whenever any tool is running — chips fly during normal cuts, not just accidents.
- Ears always. Any power tool over ~85 dB needs hearing protection. That is every saw, router and sander you own.
- Lungs protected. N95 respirator minimum for cutting and sanding; P100 for hardwood dust (see below — it is a classified carcinogen).
- Guards stay on. Never remove a blade guard, riving knife or anti-kickback pawls. They are not optional accessories.
- Never stand in the kickback line. Stand to the side of the blade, not directly behind it.
- Push sticks for narrow cuts. If your fingers would come within 6 inches of a blade, a push stick does the pushing. Keep several at the saw.
- Clamp it or don’t cut it. A workpiece that can move is a workpiece that will move — usually into you.
- Unplug before blade changes. Lockout during any adjustment, blade swap or bit change. Always.
- Sharp is safe. A dull blade forces the cut, binds, and kicks back. Sharp tools cut without effort.
- Never work tired, rushed, or distracted. The last cut of the day is where beginners get hurt. Stop early.
Eyes and ears: the PPE that actually matters
Eye injuries are roughly a quarter of workshop injuries, and they are almost entirely preventable: safety glasses with the ANSI Z87.1 stamp (ordinary prescription glasses are not safety glasses), every time a machine runs, including when you are “just watching” a cut. If you wear prescription lenses, get prescription safety glasses or wear over-glasses.
Hearing damage is cumulative, permanent and sneaky — you do not notice it until it is done. Damage begins at sustained exposure above 85 dB. A table saw runs about 95–105 dB, a router over 100 dB, a circular saw around 108 dB. At 100 dB your safe unprotected exposure is minutes, not hours. And the maths on cheap protection is sobering: an NRR-25 earplug gives only about (25 − 7) ÷ 2 = 9 dB of real-world reduction, so against a 100 dB saw you are still at ~91 dB — above the damage line. Use NRR-31+ plugs for the table saw, and double protection (plugs plus earmuffs) for circular saws and routers, which buys roughly 5 dB more. Custom-moulded plugs are the comfortable long-term answer.
| Task | Eyes | Ears | Lungs |
|---|---|---|---|
| Any sawing / routing / planing | ANSI Z87.1 glasses | Muffs NRR 25+ or plugs NRR 31+; double for circular saw/router | N95 minimum |
| Sanding (hand or machine) | Glasses | Muffs NRR 25+ (sander ~80–90 dB) | P100 for hardwoods; N95 for softwood |
| Mixing/applying finishes, epoxy, solvents | Glasses (splash risk) | — | Half-face respirator with organic-vapour cartridges |
| Treated / composite lumber (MDF, particle board) | Glasses | As above | P100 — glue and treatment chemicals add to the dust hazard |
| Chisel / hand-tool work | Glasses when malleting | — | — |

Wood dust: the hazard you cannot see
Wood dust is not just an annoyance. The International Agency for Research on Cancer (IARC) classifies hardwood dust — oak, beech, walnut, mahogany and friends — as a Group 1 human carcinogen, the same category as asbestos, linked to sino-nasal cancer. Fine particles under 5 microns go deep into the lungs and are linked to asthma, chronic bronchitis and reduced lung function. Softwood dust is less dangerous but still irritating. MDF and particle board add formaldehyde-based glue to the mix.
The fix is layered, and each layer matters: capture dust at the source (a shop vac with a HEPA filter hooked to the tool’s dust port — not just a bag), filter the air (a ceiling-mounted air filter or a box-fan HEPA setup run during and 30 minutes after work), and wear a respirator: N95 for occasional softwood work, P100 for sustained hardwood machining. Never blow dust off your clothes or body with compressed air — that is how you inhale the worst of it; use a brush or vacuum instead. And empty the dust collector before it overflows: combustible dust accumulation is a fire and explosion risk, which is why shops clean regularly, especially around machines.


Kickback: the injury with the highest stakes
Kickback is when the workpiece binds on the spinning blade and is thrown back at you at roughly 100–120 mph — faster than any reaction time. Around 60% of serious table-saw hand injuries are precipitated by a kickback event. The board travels in a straight line back from the blade, which is why the rules below exist.

- Riving knife and pawls stay on. The riving knife rides in the kerf and physically stops the wood pinching the back of the blade — the number one kickback cause. The pawls dig in if the wood starts moving backward. The guard keeps hands off the blade. Never remove them.
- Stand to the side of the blade, never directly behind it. Be in the line of fire and a kicked-back board hits your torso. Stand slightly off to one side.
- Push stick for anything narrow. Under ~6 inches between blade and fence, hands are done — a push stick keeps fingers 8+ inches away while applying forward and downward pressure. Keep several at the saw; if you have to walk across the shop to fetch one, you will not use it.
- Fence parallel, workpiece flat, no freehanding. A fence that is not parallel to the blade pinches the board. Warped or cupped boards rock and bind. Freehand cuts on a table saw are how kickbacks start — use the fence or a miter gauge, always.
- Blade height and sharpness. Set the blade just above the workpiece; a blade set too high increases kickback risk. A dull blade makes you force the cut, and forcing is what binds the wood.
- Support long pieces and control the cutoff. Unsupported ends drop mid-cut and pinch the blade. Never stand where the cutoff will fall. Let the blade reach full speed before engaging the wood, and feed at a steady pace — never force, never stall.
- Zero-clearance insert for small or thin pieces, so they cannot drop into the throat plate and jam.
- Never reach over or behind a spinning blade to grab a cutoff. Wait for the blade to stop.
The same logic applies to circular saws (kickback throws the saw back at you): keep the blade guard working, support both sides of the cut so the offcut cannot pinch, use a sharp blade, and never stand directly behind the saw. On a router, feed against the rotation of the bit and make sure the bit is fully seated in the collet.
Secure the work: clamps, benches and small pieces
After kickback, the next biggest injury source is a workpiece that moves mid-cut — a board that twists under a chisel, a small offcut that spins on a drill press. The rule is absolute: if it can move, clamp it. A solid workbench with a vise, bar clamps, and a non-slip mat under the workpiece solves 90% of it. For small pieces, use a sacrificial backer board so the blade exits into wood, not air, and use hold-downs rather than fingers. This is also where the joints discipline from our joints guide pays off twice: a dry-fit, clamped assembly is a stable assembly.

Blade changes, sharpening and the “sharp is safe” rule
Always disconnect power before changing blades, bits or making adjustments — pull the plug, not just the switch. A bumped switch is a spinning blade. While you are at it: a sharp tool is a safe tool. A dull chisel slips; a dull saw blade binds and kicks back. Learn to sharpen — it is one of the highest-return skills in the shop, and our tools guide covers which sharpening kit to start with. Two absolutes: never wear gloves near a spinning blade (the blade grabs the glove and pulls the hand in — bare hands plus push sticks), and never reach over a blade that is still coasting down; wait for it to stop.
Chemicals, finishes and fire
Finishes and solvents bring their own hazards. Work with ventilation (open window plus fan, or work outside), wear nitrile gloves for stains and solvents, and use a half-face respirator with organic-vapour cartridges for spray finishes, epoxy and anything with strong fumes — epoxy in particular sensitises the lungs, and once sensitised, even small exposures trigger reactions. Our epoxy river table guide covers mixing safety in detail.
Fire is the quiet one: oily rags (linseed, tung, Danish oil) can spontaneously combust as they dry and concentrate heat. Never wad them up and bin them — spread them flat outside to harden, or store them in a sealed, water-filled metal can, and dispose of them as hazardous waste. Solvent-soaked rags are highly flammable even when they will not self-ignite. Store solvents and finishes in a ventilated cabinet away from ignition sources, keep sawdust cleaned up (it is fuel), and keep a fire extinguisher (ABC dry-powder) mounted by the door, checked yearly.

Electrical safety and shop layout
- GFCI/RCD protection on every outlet that serves power tools — it cuts power in milliseconds if you become part of the circuit. In damp garages this is non-negotiable.
- No daisy-chained extension cords. One heavy-gauge cord (12–14 AWG) direct to the outlet, sized for the tool’s amperage. Undersized or coiled cords overheat.
- Cable management: cords off the floor or covered, away from blade paths, sharp edges and heat. A tripped cord can pull a tool off the bench or yank a running saw.
- Clear floor and clear exits. Sawdust on concrete is slippery — sweep after every session, especially around the saw. Trips cause falls; falls near running blades cause cuts.
- Lighting: bright, shadow-free light over the workbench and machines. You cannot avoid what you cannot see.
- Inspect cords and plugs regularly; tape is not a repair.

The mindset rules: clothing, focus, alcohol
No loose sleeves, dangling drawstrings, jewellery, rings or watches — anything that can catch on a spinning blade. Tie back long hair. Closed-toe shoes always (a dropped chisel or offcut finds feet fast). No gloves near rotating blades or bits. And the rule nobody wants to hear: never operate power tools after alcohol, and never when you are exhausted, angry or in a hurry — impaired focus is behind a large share of serious injuries. Rehearse every cut before you switch on: if your hand would ever be in the blade path, choose a different way to make the cut. Finally, read the manual of every new tool — it tells you where the no-go zones are.
First aid and emergencies: prepare before you need it
Keep a stocked first-aid kit on the wall by the door — bandages, gauze, adhesive dressings, antiseptic wipes, tweezers for splinters, a tourniquet or wide pressure bandage, and an eye-wash bottle (wood chips in an eye are a flush-now emergency, not a rinse-at-home one). Write the local emergency number on a card taped inside the kit. Know the pressure-point basics for severe bleeding: firm direct pressure first, elevate, and call emergency services for anything deep, arterial or not stopping in 10–15 minutes. Keep a charged phone in the shop or know where the nearest one is. Tell someone you are in the shop when you work alone with machinery.

FAQs
What is the most dangerous tool in a home workshop?
The table saw, by injury statistics — largely because of kickback (about 60% of serious hand injuries on it follow a kickback event). The router is close behind for hand injuries. But any tool is dangerous when guards are off, the workpiece is unsecured, or you are tired.
Do I really need a respirator, or is a dust mask enough?
For occasional softwood sanding, a well-fitted N95 is reasonable. For regular work — and always for hardwoods, MDF and treated lumber — use a P100 respirator. Hardwood dust is a Group 1 carcinogen (IARC), and the damage is cumulative over years, not days.
Why should I never wear gloves near a spinning blade?
Because the blade grabs the glove fabric and pulls your hand into the cutter — gloves convert a nick into an amputation risk. Bare hands, push sticks, and gloves only for handling rough lumber, chemicals or finishes (away from any spinning part).
What causes table saw kickback and how do I prevent it?
The workpiece pinching the back of the blade, usually from a non-parallel fence, a warped board, freehand cutting, or a dull blade — then the board is thrown back at 100+ mph. Prevent it with the riving knife and pawls on, the fence parallel, a sharp blade, push sticks, standing to the side, and never freehanding.
How loud are woodworking tools, and when do I need ear protection?
Table saw ~95–105 dB, router 100+ dB, circular saw ~108 dB, sander 80–90 dB. Damage starts at 85 dB sustained. In short: wear protection for any power tool, every time — use NRR-31+ plugs for the table saw and double protection for circular saws and routers.
Are oily rags really a fire risk?
Yes — genuinely. As oil finishes (linseed, tung) dry they release heat; a wadded rag concentrates it until the rag can spontaneously ignite. Spread rags flat to dry or store them in a sealed, water-filled metal can, and dispose of them as hazardous waste. Solvent-soaked rags are highly flammable too.
What should be in a woodworking first-aid kit?
Bandages and gauze in several sizes, adhesive dressings, antiseptic wipes, tweezers, a pressure bandage or tourniquet, an eye-wash bottle, and a card with emergency numbers. Mount it by the door, check it twice a year, and add a fire extinguisher (ABC dry-powder) and a HEPA shop vac nearby.
Should I buy a saw with flesh-sensing technology (like SawStop)?
If the budget allows, it is the single biggest safety upgrade available — the blade stops in milliseconds on skin contact, turning a catastrophic injury into a nick. It does not replace any of the rules above (kickback, dust and chemicals still apply), but as insurance it is excellent. Until then, the riving knife, pawls, guard and push sticks are doing the same job for free.
Build the habit before you build the project
Safety is not a checklist you do once — it is the default state of the shop. Glasses on the bench where your hand finds them, muffs on the pegboard next to the saw, respirator hanging by the sander, push sticks at the saw, clamps on the bench, kit on the wall. When the gear is always in reach and the rules are always the same, safe work stops being a decision and becomes a reflex. That reflex is what lets you enjoy this for decades instead of learning from one bad afternoon. When you are ready to put those rules to work, our tools guide picks the kit (including PPE and push sticks), the plans guide teaches you to read a cut list before you cut, and the sanding and finishing guide covers the dust-heavy end of the shop.