10 Easy DIY Wood Wall Art Ideas to Fill Blank Walls
Blank walls are expensive to fill with store art — a single large canvas easily tops two hundred dollars. These ten DIY wood wall art ideas turn affordable lumber and shop scraps into gallery-worthy pieces for the cost of a pizza night.
Every project below works with basic tools and includes the difficulty, time, and materials up front. Interior editors at Domino and Architectural Digest keep naming natural wood texture as the antidote to sterile walls, so DIY wood wall art is both creative and current. If your walls need more than art, our wood accent wall ideas cover full-panel treatments. You don’t need carving skills or expensive hardwoods — most of these build from plywood and 1×4 stock.
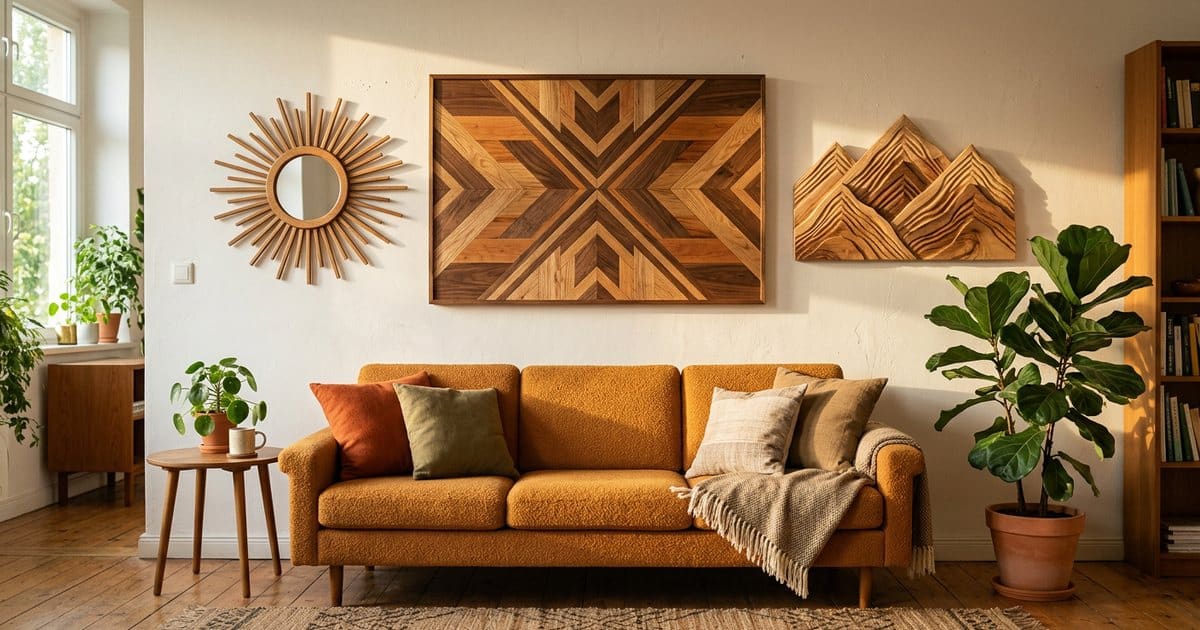
1. Geometric Wood Stain Art
Cut plywood into triangles and trapezoids, stain each piece a different tone, and glue them onto a backer panel for instant modern art. The random angles do all the design work for you.
Use four to six stain tones from the same color family for a curated look. This is the most forgiving DIY wood wall art here — crooked cuts just become new angles. Seal it with a matte clear coat so oils and fingerprints never show. Work on wax paper — dried glue drips pop right off.
- Difficulty: Beginner
- Time to build: 3–4 hours
- Materials: ¼-inch plywood, wood stains in 4–6 tones, backer panel, wood glue

Alt text: handmade geometric wood wall art with varied stain tones on a living room wall
2. Layered Mountain Range Art
Two or three overlapping wood silhouettes create a mountain range with real shadow depth. Cut rolling peak shapes from thin plywood and stack them with ½-inch spacers.
Stain the back range dark and the front range light, exactly how mountains fade in nature. It’s one of the most calming pieces of DIY wood wall art you can hang above a bed. Hang it so the lowest peak sits about 8 inches above the headboard. Add a third tiny hill layer in the middle for extra depth.
- Difficulty: Beginner
- Time to build: 2–3 hours
- Materials: ¼-inch plywood, jigsaw, wood stain, spacer blocks, picture hangers

Alt text: handmade layered wooden mountain range wall art hanging above a bed
3. Herringbone Scrap Wood Panel
The herringbone pattern looks complex but it’s just short strips cut at 45 degrees and laid tip-to-tip. This is the ultimate high-impact use for the offcut bin — see our scrap wood projects for more.
Work from the center line outward so both edges stay even. A mix of natural tones makes the pattern pop without any stain at all. Of all these DIY wood wall art ideas, herringbone hides the most scrap-bin sins — gaps vanish into the pattern. Frame it with 1×2 trim and it reads as millwork. Run a block sander across the finished face to level any proud strips.
- Difficulty: Intermediate
- Time to build: one weekend
- Materials: wood offcut strips, plywood backer, miter saw, wood glue, clear finish

Alt text: handmade herringbone wood wall panel made from scrap strips hanging in a hallway
4. Wood Sunburst Mirror
A round mirror surrounded by radiating wood dowels turns sunlight into sculpture. Cut 1-inch dowels in graduated lengths and fan them around a 10-inch mirror disk.
Stain the dowels in alternating tones or leave them raw for a coastal feel. It’s classic DIY wood wall art that works as beautifully over a console as it does in an entry. A small French cleat on the back keeps the mirror rock-solid. Kiln-dried dowels stay straight — skip anything warped at the store bin. If you love mirror builds, our bathroom wood projects include a matching framed-mirror upgrade.
- Difficulty: Beginner
- Time to build: 2–3 hours
- Materials: 10-inch round mirror, 1-inch dowels, plywood mounting disk, wood glue, hangers

Alt text: handmade wooden sunburst mirror with radiating dowels on a painted wall
5. Vertical Slat Art Panel
Glue 1×2 slats side by side with varied depths, and the wall literally changes as you walk past. Cutting every third slat a half-inch proud creates a rippling, almost architectural texture.
Keep the palette restrained — one wood tone or a single wash of color. Large panels like this also anchor the styling tips in our wood home decor projects perfectly. It’s the most architectural DIY wood wall art in the roundup, and raking evening light does half the styling. Build two narrower panels and flank a bed or doorway for a designer look. A single coat keeps the matte shadow play crisper than heavy varnish.
- Difficulty: Intermediate
- Time to build: 4–5 hours
- Materials: 1×2 strips, plywood frame, wood glue, brad nails, clear or tinted finish

Alt text: handmade vertical wood slat art panel with varied depths on a modern wall
6. Wood Slice Mosaic
A tray of end-grain wood slices in mixed diameters makes a warm, organic wall piece. Glue the rounds tight into a plywood frame and the gaps become part of the design.
Collect slices over a month of small projects and the material is free. It’s one of the most customizable DIY wood wall art ideas on this list — squares, circles, and hearts all work. Roll each slice in glue and tap with a mallet for a drum-tight pack. Sprinkle in a few dyed slices if you want a pop of color.
- Difficulty: Beginner
- Time to build: 2–3 hours
- Materials: wood slices in mixed diameters, plywood frame, construction adhesive, clear sealant

Alt text: handmade wood slice mosaic wall art with mixed round slices in a frame
7. 3D Layered Topographic Map
Stack cut layers of plywood like elevation lines and any landscape becomes your art — a favorite lake, coastline, or mountain. Grab a contour map of your spot and scale each layer with a copier.
Stain the water layer deep blue and leave the land natural. This DIY wood wall art always starts conversations because it’s a place that means something to you. Trace each layer onto its own sheet so the grain flows across joints. Number the layers on back before gluing — order matters.
- Difficulty: Advanced
- Time to build: one weekend
- Materials: ¼-inch plywood layers, scroll saw, wood glue, printed contour map

Alt text: handmade 3D layered wooden topographic map wall art with blue water layer
8. Chevron Wood Wall Hanging
Chevron is herringbone’s cheerful cousin — whole-length strips meet at a clean point instead of interweaving. Two rails and a diagonal cut pattern come together fast on a miter saw.
Keep the colors light: whitewash, gray, and natural look fresh in bedrooms and nurseries. It’s one of the fastest DIY wood wall art projects for a big visual payoff. Always dry-fit the first four rows before glue touches wood. Frame the panel edge with 1×2 trim, same as the herringbone.
- Difficulty: Beginner
- Time to build: 2–3 hours
- Materials: 1×3 boards, miter saw, plywood backer, whitewash and gray stain, hangers

Alt text: handmade chevron wood wall hanging in light tones above a bedroom bench
9. Woven Wood Strip Wall Hanging
Weave thin wood strips over and under a simple frame and you’ve built a wooden textile. Veneer strips or resawn ⅛-inch lumber bend enough for the weave.
Alternate light and dark strips in pairs for a checkerboard rhythm. It’s an unexpectedly meditative build and a great gift — batch several alongside our handmade wooden gift ideas. Among these DIY wood wall art ideas, the weave surprises visitors most because nobody expects wood to flex. Clamp the frame overnight — the weave keeps tension as the glue sets. Resaw wider boards on the table saw if you can’t find veneer locally.
- Difficulty: Intermediate
- Time to build: 3–4 hours
- Materials: veneer or thin wood strips, 1×2 frame, wood glue, Danish oil

Alt text: handmade woven wood strip wall hanging with checkerboard weave pattern
10. Wooden Moon Phase Set
Cut eight graduated circles, shape the edges into crescents with a sander, and hang them in a horizontal row — instant celestial art. The phases read best in one rich stain on a light wall.
Space them evenly with a paper template before driving a single nail. Among DIY wood wall art ideas, this set is the quickest to batch for gifts and craft fairs. Stain both face and edge so no raw plywood lines show. Space phases two inches apart — closer starts reading like polka dots.
- Difficulty: Beginner
- Time to build: 1–2 hours
- Materials: ½-inch plywood, circle saw or jigsaw, wood stain, picture hangers

Alt text: handmade wooden moon phase wall art set hung in a row on a light wall
Conclusion: Fill Blank Walls with Your DIY Wood Wall Art
The best art has a story, and nothing beats “I made that.” These ten DIY wood wall art ideas run from a two-hour moon phase set to a showpiece topographic map, all with basic tools and honest lumber.
Pick the wall that bothers you most and start there. Photograph your finished piece for us — we love sharing reader builds. For full-size templates of every project above, check out Ted’s Woodworking plans — our honest Ted’s Woodworking review shows what’s included. Then subscribe on the Home Decor Woodworking homepage so you never miss new DIY wood wall art ideas and project plans.
Affiliate Disclosure: This post contains affiliate links. If you purchase through these links, we may earn a small commission at no additional cost to you. We only recommend products we genuinely believe will help your woodworking journey.