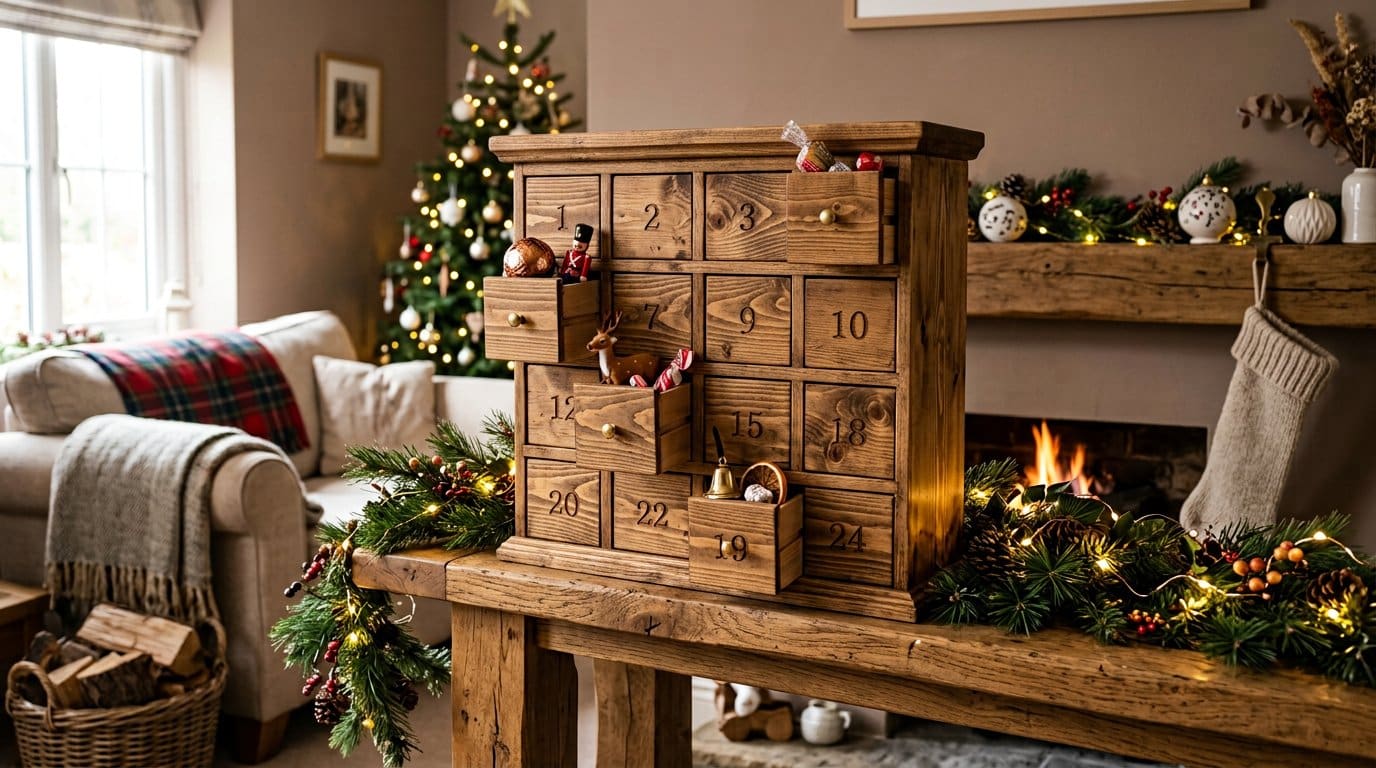
A cardboard advent calendar lasts three weeks and goes in the bin on Boxing Day. A wooden one gets brought down from the loft every December for the next twenty years, and it is one of the few Christmas woodworking projects where the build is genuinely straightforward — a box, a grid, and 24 small drawers repeated. That repetition is the whole trick. Build one drawer well, then batch-cut the other 23 from a stack of thin plywood in a single session.
This guide gives you six different wooden advent calendar builds, from a full 24-drawer cabinet with a complete cut list to a wall-hung cubby grid you can finish in an afternoon, plus the numbering methods that actually look good, the finishes that survive ten Christmases with children, and what to put inside that does not cost a fortune.
Quick answer: the best all-round build is a 4 × 6 drawer cabinet — 24 inches wide, 30 inches high, 6 inches deep, cabinet from 3/4-inch plywood, grid and drawers from 1/4-inch plywood. It is a weekend project for a confident beginner, costs roughly $90–$130 in materials, and holds enough for real treats. If you want something faster, build the wall-hung cubby grid (about $40 and one afternoon). If you have small children, skip small knobs — use finger cutouts instead, and wall-anchor anything that hangs.
The six builds at a glance
| Build | Finished size | Main material | Difficulty | Time | Material cost | Best for |
|---|---|---|---|---|---|---|
| 1. 24-drawer cabinet | 24″ W × 30″ H × 6″ D | 3/4″ + 1/4″ plywood | Confident beginner | One weekend + finish | $90–$130 | The heirloom version; generous compartments |
| 2. Wall-hung cubby grid | 30″ × 20″ × 3″ | 1/4″ + 1/2″ plywood | Beginner | 3–4 hours | $35–$50 | Small homes, flat storage, quick win |
| 3. Hinged-door book | 18″ × 24″ open | 1×6 pine + 1/4″ ply | Beginner–intermediate | 5–6 hours | $30–$45 | Wall space, a “reveal” moment each day |
| 4. Peg countdown board | 24″ × 12″ | 1×8 pine | Beginner | 2 hours | $15–$25 | Hanging sachets or tiny tins, minimal tools |
| 5. Ladder shelf with 24 tins | 5 ft tall | 2×2 + 1×4 | Beginner | 3 hours | $35–$55 | Floor display, big treats, big impact |
| 6. Scrap crate pyramid | 20″ × 20″ | Scrap 1/2″ ply or crates | Beginner | 2–3 hours | $0–$20 | Using up offcuts, kids’ rooms |
Build 1: the 24-drawer cabinet
This is the build the rest of this guide refers back to. Read the whole plan before you cut anything, and do not skip the test-drawer step — plywood thickness varies by up to 1/32 inch between sheets, and 24 drawers that bind are 24 drawers you will sand by hand in December.
Plan at a glance
Finished cabinet: 24″ wide × 30″ high × 6″ deep. Carcass from 3/4-inch cabinet-grade plywood; grid, back and drawer boxes from 1/4-inch plywood; decorative drawer fronts from 3/4-inch plywood or solid stock. Layout: 4 columns × 6 rows = 24 openings, each roughly 5⅜″ wide × 4½″ high, which takes a drawer box about 5⅛″ × 4¼″ × 5″ deep. That fits chocolates, small toys, folded notes, and a decent handful of sweets.
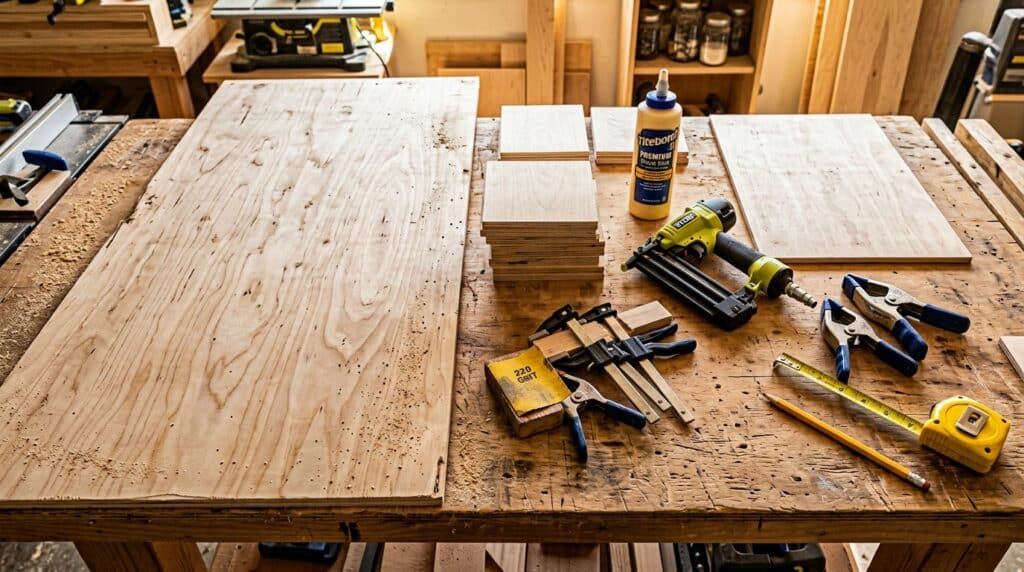
Materials and tools
• One half-sheet (4′ × 4′) of 3/4-inch cabinet-grade plywood — birch, maple or good sanded pine ply
• One 4′ × 8′ sheet of 1/4-inch plywood for the back, grid and all 24 drawer boxes
• Wood glue, 1¼-inch cabinet or pocket screws, 3/4-inch brads
• 80, 120, 180 and 220-grit sandpaper
• Table saw or a good circular saw with a straight edge, brad nailer or hammer and nail set, clamps, combination square, tape measure
• Optional: 24 small knobs, or a 1-inch Forstner bit for finger cutouts, or leather offcuts for loop pulls
Cut list: cabinet and grid
| Part | Qty | Material | Cut size |
|---|---|---|---|
| Top and bottom | 2 | 3/4″ ply | 24″ × 6″ |
| Sides | 2 | 3/4″ ply | 28½″ × 6″ |
| Back panel | 1 | 1/4″ ply | 24″ × 30″ |
| Vertical dividers | 3 | 1/4″ ply | 28½″ × 5¾″ |
| Horizontal shelves | 5 | 1/4″ ply | 22½″ × 5¾″ |
Cut list: one drawer box (multiply by 24)
| Part | Qty per drawer | Cut size |
|---|---|---|
| Sides | 2 | 5″ × 4″ |
| Front and back | 2 | 4⅝″ × 4″ |
| Bottom | 1 | 5⅛″ × 5″ |
| Decorative front (3/4″ stock) | 1 | 5⁵⁄₁₆″ × 4⅜″ |
That is 48 sides, 48 front/back pieces and 24 bottoms — 120 small parts. Cut them in production runs: set a stop block, cut all 48 sides at once, then reset and cut all 48 fronts. Stack parts as you go, keep grain direction consistent, and label the stacks with masking tape.
Step by step
1. Mill and check the plywood. Cut the carcass parts first, then measure the actual thickness of both sheets with calipers. Nominal 3/4 inch is often 23/32 inch, and 1/4 inch can be 3/16 or 7/32. Every downstream dimension depends on this, so write the real numbers on the sheet.
2. Assemble the carcass. Glue and screw the top, bottom and sides into a box, checking diagonals before the glue sets — a cabinet that is 1/8 inch out of square will produce drawers that rub on one corner. Square the back with a cross-measure, then glue and brad the 1/4-inch back panel on. The back is what keeps the box square forever.
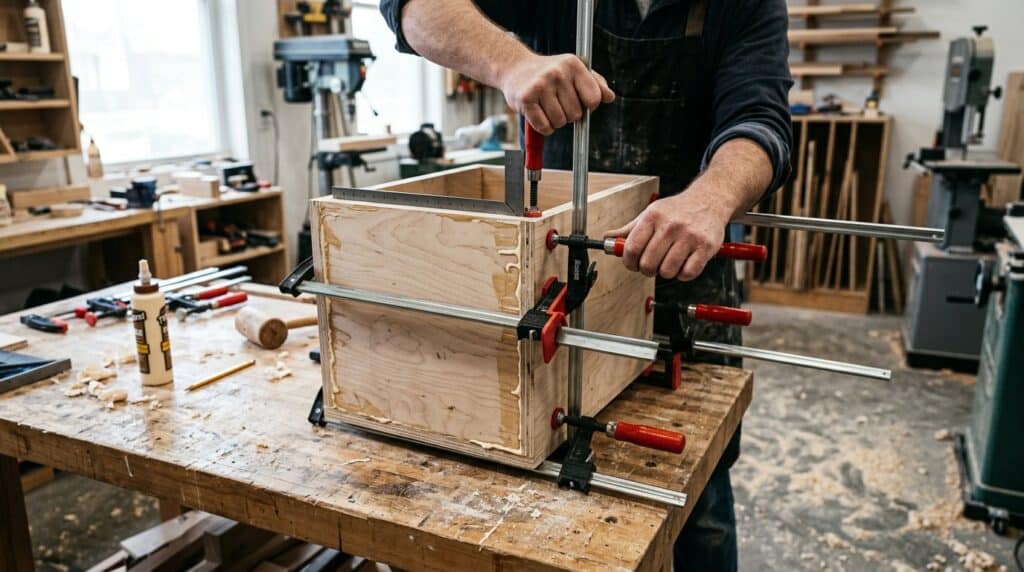
3. Fit the grid. Cut the vertical dividers and horizontal shelves about 1/16 inch wide and plane or sand to a light push fit. Dry-fit the whole grid outside the cabinet first: three verticals evenly spaced across the 22½-inch opening, five horizontals evenly spaced up the 28½-inch height. Mark their positions with a spacer block rather than arithmetic — that is what keeps all 24 openings identical. Glue and brad them in.
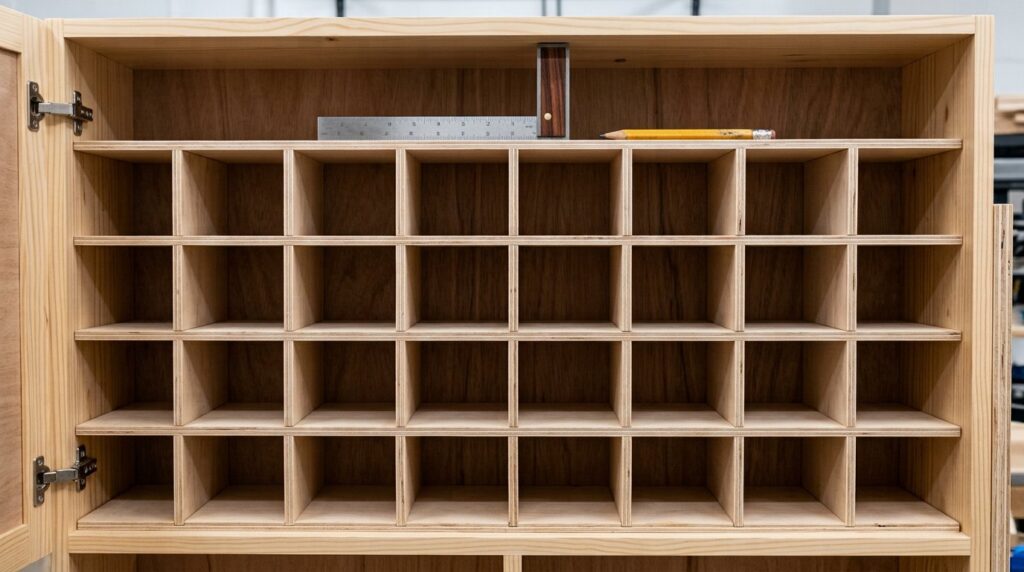
4. Build one test drawer. Cut two sides at 5″ × 4″, one front and one back at 4⅝″ × 4″, and a bottom at 5⅛″ × 5″. Glue the four walls on top of the bottom so the sides cover the ends of the front and back — that gives an exterior around 5⅛″ wide. Check the fit in several openings, not just your favourite one. Target a drawer that slides with a light finger push and has roughly 1/16 inch of play each side. Too tight is far worse than slightly loose, because paint and humidity both swell plywood.
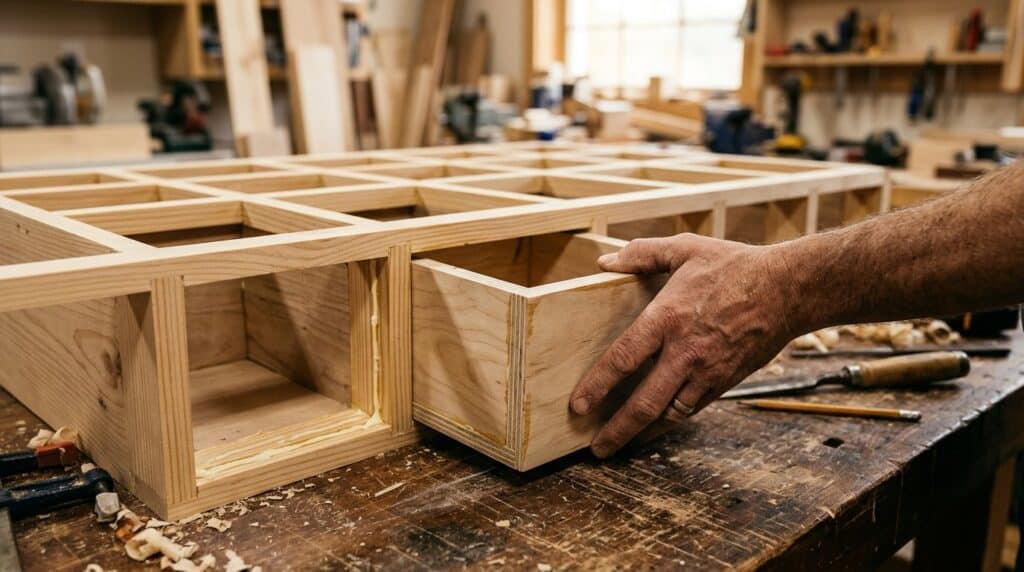
5. Batch the remaining 23. Once the test drawer is right, adjust nothing and cut the rest. Glue and brad in assembly-line fashion — put together all 24 sides and fronts first, then add bottoms. A brad nailer pays for itself here.
6. Add decorative fronts. Cut 24 fronts at 5⁵⁄₁₆″ × 4⅜″ from 3/4-inch plywood or solid stock. Before gluing, lay them all out and shuffle them until the grain and colour look evenly distributed — this is the step that separates a homemade look from a bought one. Use playing cards or thin shims as spacers so the reveals around all 24 drawers match, then glue and clamp each front to its box.
7. Sand and ease the edges. 120 grit on the flats, 180 on the edges, and break every sharp corner with two passes of 220. Ease the openings too: a rounded-over front edge on each cubby stops the paint chipping every time a drawer slides in.
8. Number and finish. Number the fronts before final assembly of the pull hardware so you can still lay them flat. Then paint, wax or oil (see the finishing section below), let it cure fully, and only then fill it.
Build 2: wall-hung cubby grid
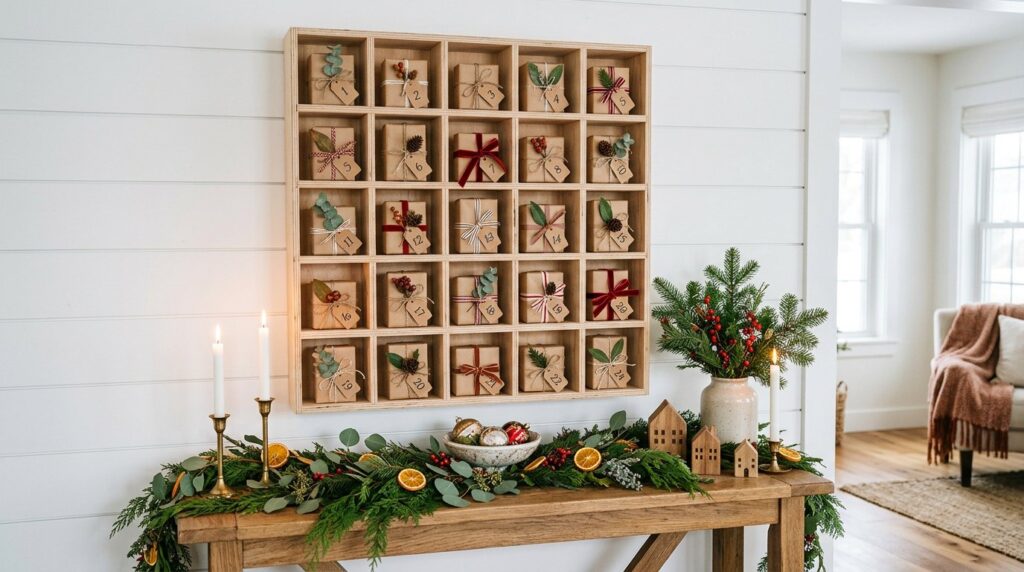
Two-thirds of the cabinet, a third of the work. Build a 6 × 4 grid of open cubbies — 30 inches wide × 20 inches high × 3 inches deep — from 1/2-inch plywood for the frame and 1/4-inch plywood for the dividers. Each cubby ends up around 4⅞″ × 4⅞″, big enough for a small wrapped parcel or a tiny tin.
The construction trick is to build three ladders (top rail, bottom rail, five uprights each) and stack them, rather than trying to fit 20 loose dividers into a box. Glue and brad, then glue the whole grid to a 1/4-inch back panel, add a French cleat or two keyhole hangers to the back, and hang it. Fill the cubbies with kraft-paper parcels numbered 1–24 in a marker or stamp, and keep it flat for storage — this version fits in a cupboard or under a bed, which the cabinet does not.
Build 3: the hinged-door book
This is the one guests ask about. Build two shallow trays — 18 × 24 inches, sides from 1×4 pine, backs from 1/4-inch plywood — and hinge them along one long edge so the calendar stands like a book on a shelf or hangs flat when open. Twelve compartments in each tray gives you 24 doors.
Cut the compartments with 1×2 dividers on edge, then make doors from 1/4-inch plywood at about 4 × 4½ inches each, hung on small brass hinges or, cheaper and quicker, held in place with a magnetic catch and a simple finger notch. Brass cup hooks or tiny knobs as pulls. Number the doors in a scattered order — 1, 14, 7, 22 — because random numbering is how the real ones work and it stops everyone counting the drawers to work out what day it is.
Build 4: peg countdown board
The two-hour version, and the best answer if your tools are limited to a saw, a drill and sandpaper. Take a 1×8 at 24 inches, round the top corners, and lay out 24 positions in a 6 × 4 pattern. Drill 3/16-inch holes and glue in 2-inch lengths of 3/16 dowel, angled very slightly upwards, or fit 24 small cup hooks instead.
Hang a small numbered sachet, a tiny tin, a felt pocket or a wooden tag from each peg. The board is only 12 inches tall so it fits above a doorway or a kitchen shelf, and because nothing slides, it never binds. If you want a version children can use unsupervised, use hooks with closed eyes and short strings.
Build 5: ladder shelf with 24 tins
The floor-standing statement piece. Two 2×2 legs, five or six 1×4 rungs set about 10 inches apart, with a 1×4 back brace forming an easel — the same A-frame logic as a ladder-style wooden Christmas tree, just wider and shallower. You need 24 small tins, pails or boxes; lay them out on the rungs first to check you can actually fit 24 before you cut anything.
Keep the top rung narrow so the whole thing reads as a tree shape from across the room, number the tins rather than the ladder, and add a small lip or a strip of 1/4-inch trim to each rung so nothing slides off when the door slams. Floor-standing means it needs to be stable — a 5-foot ladder with a narrow footprint should be against a wall or fitted with a strap.
Build 6: scrap crate pyramid
If your offcut pile is out of control, this build costs nothing. Make 24 small open crates from 1/2-inch scrap ply — four walls on a bottom, no lid, roughly 4 × 4 × 3 inches — and stack them pyramid-style: 5 crates on the bottom row, then 4, 3, 2, 1. That is only 15, so either widen the base to 6–5–4–3–2–1 (21) plus three on the floor in front, or use a 6 × 4 arrangement in a simple frame.
Paint each crate one colour from a two- or three-colour palette, number them with a stencil, and stack against a wall so nothing can topple. This is also the version to build with children: no screws above 1¼ inch, everything glued, and no finish on the inside of the crates if sweets go straight in.

Numbering: five methods that look right
The numbers are what make it read as an advent calendar rather than a set of drawers. In rough order of effort:
1. Pyrography. Burn the numbers with a wood-burning pen. Cheap, permanent, and it looks hand-made in the best way. Use faint pencil lines as a guide, work slowly, and practise on offcuts first — the burn deepens as the tip heats.
2. Stencil and paint. Cut a set of 1½-inch numeral stencils, dab with a stencil brush and very little paint, and lift straight up. Crisp, uniform, and fast once you have the stencils. Seal over the top with wax so they do not wear through at the finger point.
3. Adhesive vinyl or house numbers. The ten-minute option: die-cut vinyl numerals, or small brass house numbers screwed to each front. Brass numbers on white-painted drawers look like a shop-bought apothecary cabinet.
4. Branding iron or rubber stamp. Good for a rustic look on solid fronts. Stamp into the wood before finishing, not after, so the ink or burn does not sit on top of the finish.
5. Wood-burned dots. For a minimalist version, burn a pattern of small dots instead of numerals — five dots for the fifth, twelve for the twelfth. Slower to read, but lovely in a modern room.

Finishing that survives ten Decembers
An advent calendar gets handled 24 times a year by people wearing jumpers, eating chocolate, and pulling drawers with buttery fingers. Finish it accordingly.
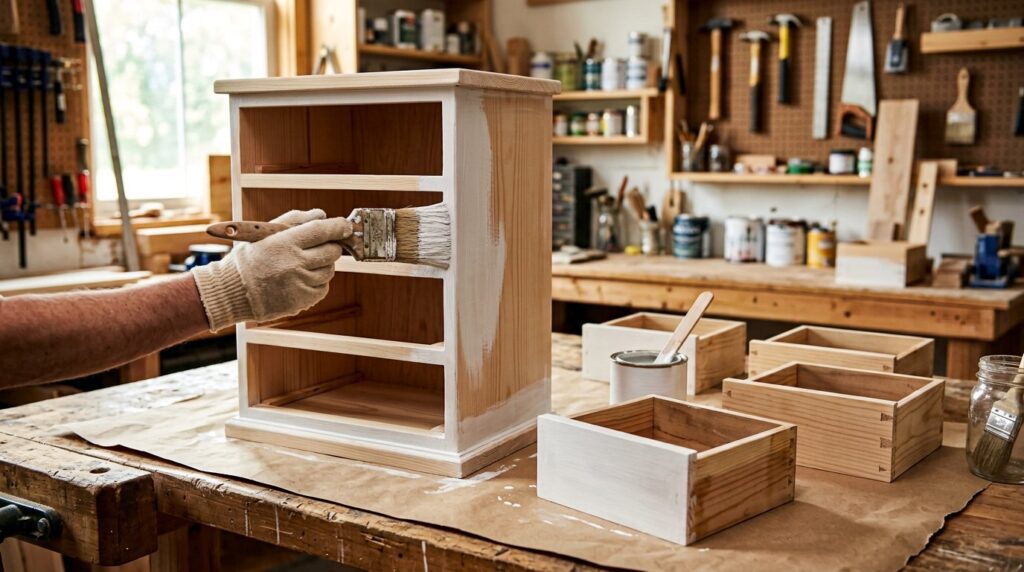
Paint — chalk or mineral paint, two thin coats, then a clear wax or water-based polyurethane on the fronts and the openings. This is the most practical finish for a family calendar, and the easiest to touch up in future years. Choose a child-safe, low-VOC paint and let it cure for a full week before filling, not the 24 hours on the tin.
Wax or oil — for a natural-wood look. A hard wax oil on the carcass and fronts, nothing at all inside the drawers. Oiled and waxed calendars need a refresh every couple of years, which is a ten-minute job.
Whitewash or limed — thin white paint wiped back across the grain, then sealed. Reads as Scandinavian, hides plywood edges well, and shows the numbers clearly.
Two things to avoid: no finish inside the drawers if sweets or unwrapped food go in, and no solvent-based finish anywhere near a build that children will handle daily until it has fully cured. If in doubt, leave the inside bare and line each drawer with a paper square you replace every year.
What goes in 24 drawers
The filling is where these calendars quietly get expensive, so plan it in advance and buy in one shop, not twenty.
| Filler theme | What goes in | Total cost for 24 drawers | Works for |
|---|---|---|---|
| Classic sweets | Wrapped chocolates, 2–3 per drawer, plus a big one on the 24th | $15–$25 | Everybody |
| Small toys | Pencil toppers, marbles, mini figures, bouncy balls, stickers | $25–$45 | Younger children |
| Notes and promises | Folded slips — “pick the film tonight”, “hot chocolate out” — free or nearly | $0–$5 | Older kids, partners |
| Ornament a day | 24 tiny wooden or felt decorations that go straight on the tree | $20–$40 | Mixed ages; build it once |
| Stationery / craft | Washi tape, coloured pencils, erasers, mini washi rolls | $15–$30 | Teenagers, classrooms |
| Grown-up | Tea bags, chocolate, tiny tools, seed packets, a lottery ticket on the 24th | $20–$50 | Workshop or kitchen calendars |
Two drawer sizes matter here: keep each compartment at least 4 inches in each direction so a folded note fits flat, and check that a standard wrapped chocolate or a matchbox-size toy actually drops in before you commit to the grid. If your drawers are only 3 inches wide, plan for sweets, jewellery and notes only.
Safety and the two mistakes people make
The first mistake is small parts. Anything with knobs, hinges or removable numbers is a choking hazard for children under three — build the peg board or the crate pyramid for that age, and keep the tiny tins out of reach. The second is a wall-hung calendar that is not anchored: a 30-inch plywood box full of chocolate is heavier than it looks, and children pull on drawers. Use a French cleat into studs, or proper hollow-wall anchors rated for the load, never a single picture hook.
On the build side, standard workshop rules apply and are worth repeating: eye, ear and respiratory protection for all the plywood cutting — sheet goods produce fine dust — clamps on every small part, and hands well clear of the blade when you are cutting 120 drawer parts by the stop block. Small parts and a table saw is exactly the combination where push sticks matter.
If the calendar is going on a mantel with lights, use LED only, keep cords away from the drawer fronts, and never put a real candle anywhere near it. A wooden calendar full of paper and chocolate is a fire load, not just a decoration.
Making it last — and making it yours
Write the year and your name on the back of the cabinet in pencil or a small burn, and keep a note inside the top drawer of what you filled each year. Twenty years from now that is the part people cry over, not the joinery.
For storage, take the drawers out, tape them shut in bundles of six, and store the carcass flat and dry — not in a damp garage, where plywood edges will swell and the drawers will no longer slide. Refill time is one evening in late November; buy the fillings in one order, keep a checklist, and wrap anything small in paper so the daily reveal takes a moment.
If you want the rest of the season’s builds, start with wooden Christmas ornaments to hang on the tree, browse scrap wood Christmas projects for the offcuts this build leaves behind, and use beginner Christmas woodworking plans if this is your first holiday build. The 12 days of Christmas woodworking has one project per evening, handmade wooden gifts covers the present side, and wooden nativity plans are the natural next step if you enjoy small-part work. If you are still buying tools, the beginner tool list covers what this build actually needs, and the joints guide explains the glue-and-brad joinery used throughout.
Frequently asked questions
What wood is best for a wooden advent calendar?
Cabinet-grade birch or maple plywood for the carcass, because it stays flat and takes paint beautifully, with 1/4-inch plywood for the grid and drawer boxes. Solid pine works for the frame and the decorative fronts, but keep those pieces narrow — wide solid panels will move across the heating season and can bind the drawers.
How big should the drawers be?
Around 5 inches wide by 4 inches high by 5 inches deep is the sweet spot: big enough for a folded note, a wrapped chocolate or a small toy, small enough to fit 24 into a 24-inch-wide cabinet. Anything under 3 inches square restricts you to sweets and jewellery.
Can I build this without a table saw?
Yes. A circular saw with a clamped straight edge handles the sheet goods, and because almost every part is small and square, a mitre saw or even a jigsaw with a guide will do the drawer parts. What you cannot skip is a consistent stop block — the 24 drawers only work because the parts are identical.
How long does it take to build?
The 24-drawer cabinet is a weekend of building plus a week of finish curing. The wall cubby grid is three to four hours, the peg board about two, and the ladder shelf an afternoon. Batching the drawer parts is what saves the most time — cutting 120 small pieces one at a time will double the build.
Is it cheaper to build or to buy a wooden advent calendar?
Bought refillable wooden calendars run about $60–$150 for a similar size. Building the cabinet costs $90–$130 in materials, so it is roughly a wash — you build it because you want this one, in your size, your colour, with your family’s numbers on it, and because it becomes an heirloom rather than a purchase.
What finish is safe for children?
A child-safe, low-VOC water-based paint or a hard wax oil, fully cured before use — a week, not a day. Leave the inside of the drawers bare and line them with paper, and avoid solvent-based lacquers on anything children handle daily until they are completely cured.
How do I stop the drawers binding after painting?
Paint adds thickness, so either paint the drawer boxes before final fitting and sand the sliding surfaces back lightly, or mask the sides and bottom of each drawer and paint only the fronts and the cabinet exterior. Leave roughly 1/16 inch of play per side at the test-drawer stage; seasonal humidity will take up the rest.
What if I only want 24 days and no number 25?
Standard advent runs 1–24, ending on Christmas Eve, so a 4 × 6 grid is exactly right. If you want a 25th, add a wider drawer at the bottom for Christmas Day — a 4 × 6 grid plus one full-width drawer across the base is the classic cabinet layout and makes the final day feel like the payoff.
Prices are typical U.S. retail for materials at the time of writing and will vary by region and sheet-goods prices. Cut lists assume nominal plywood dimensions; always measure your actual sheets before cutting, and work within the limits of your tools and experience.