How to Build a Floating Wood Desk for Home Office Step by Step
Welcome to the ultimate, comprehensive guide on how to build a floating wood desk for your home office step by step. Creating a customized, ergonomic workspace is one of the most rewarding and impactful DIY projects a homeowner can undertake. As remote work and telecommuting become increasingly prevalent in our modern professional landscape, optimizing your home office setup with a sleek, space-saving floating desk can dramatically improve both your daily productivity and your room’s overall aesthetics. Whether you are transitioning to a permanent work-from-home role, managing a hybrid schedule, or simply require a dedicated household administration spot, a custom-built desk provides completely unmatched functionality. 
A floating desk ingeniously removes the need for bulky, traditional legs, freeing up crucial floor space and offering a clean, modern, and highly minimalist visual appeal. Before diving headfirst into the physical construction process, it is absolutely vital to understand the structural requirements of wall-mounted furniture to ensure maximum safety and durability under heavy daily use. This detailed guide will meticulously cover everything from initial material selection and spatial planning to the final mounting phases, ensuring you have a thorough, expert-level understanding of the entire process. If you prefer to have a seasoned professional handle the heavy lifting after reading this guide, you can always explore our professional woodworking services for bespoke, pre-built solutions tailored perfectly to your specific space.
Let us outline the essential key takeaways you will gain from this comprehensive step-by-step tutorial. By meticulously following these strategic and highly detailed instructions, you will successfully craft a sturdy, beautiful floating wood desk that elevates your daily work routine and entirely transforms your home office environment. Understanding these core concepts before making your very first cut will save you significant time, money, and unnecessary frustration throughout your build.
- Structural Integrity: Learn how to properly anchor your internal support frame into wall studs for a massive, reliable weight capacity.
- Material Selection: Discover the best wood types, plywood grades, and structural hardware necessary for a professional-grade finish.
- Seamless Assembly: Master the torsion box and hidden cleat system to achieve a thick, solid-wood appearance without the crushing, unmanageable weight.
- Flawless Finishing: Understand the critical multi-step sanding and sealing process required to protect your valuable investment from spills and scratches.
- Ergonomic Setup: Gain invaluable insights into determining the optimal desk height and depth for long-term physical comfort and health.
Why Choose a Floating Wood Desk for Your Home Office?
Space Optimization and Minimalist Aesthetics
Home offices situated in modern architectural layouts often suffer from rapid clutter accumulation and a severe lack of usable square footage. A floating wood desk serves as the ultimate space-saving architectural solution, offering an expansive, highly functional work surface without the intrusive, space-hogging footprint of traditional heavy desk legs. By physically eliminating the vertical visual barriers of legs and bulky cabinet bases, the visual flow of the room is immediately restored, making even the smallest converted closet office or awkward bedroom nook feel remarkably open and airy.
Maintaining an unobstructed floor area does significantly more than merely trick the human eye into perceiving a larger, more expansive room; it provides highly tangible physical benefits. According to leading scientific researchers and professionals specialized in human factors and ergonomics, maintaining a completely clear floor area can significantly reduce visual psychological stress and allow for unrestricted office chair mobility. You no longer have to constantly worry about painfully stubbing your toe, tripping over awkward structural supports, or violently slamming your expensive ergonomic chair casters into bulky wooden table legs during a busy, high-paced workday.
Furthermore, taking the initiative to build a customized desk yourself means you retain absolute, uncompromising control over the exact spatial dimensions, wood species, and final finishing colors. Customizing your home office desk down to the precise millimeter allows you to perfectly match your existing interior design aesthetic while intimately catering to your specific daily workflow needs. Whether you desperately need an ultra-wide panoramic setup to support multiple heavy, high-resolution monitors, or you simply require a compact corner nook for a single lightweight laptop, the adaptable floating design performs flawlessly. For more incredible inspiration on tailoring your workspace to your precise needs, be sure to check out our heavily detailed woodworking DIY guides.
The Science of Wall-Mounted Strength
Many first-time builders harbor understandable anxiety regarding the weight capacity of a desk that appears to defy gravity by hanging entirely off a residential wall. The incredible strength of a properly constructed floating desk stems entirely from the mechanical leverage principles of the hidden cleat system and the immense sheer strength of structural steel lag bolts. When a sturdy two-by-four lumber frame is horizontally anchored directly into the dense vertical grain of your home’s structural wall studs, the resulting framework can easily support hundreds of pounds of downward force.
This hidden internal skeleton, often referred to as a torsion box support system, operates by transferring the heavy load of your computer equipment directly into the primary load-bearing architecture of your house. Understanding this vital load-transfer mechanism will give you the ultimate peace of mind when placing heavy, expensive electronic equipment onto your newly finished floating work surface. The desk surface itself merely acts as a beautiful wooden sleeve or shell that slides snugly over this indestructible hidden fortress, providing the illusion of a solid slab.
Comprehensive Tools and Materials List
Essential Woodworking Tools for the Job
Proper preparation and tool acquisition form the absolute cornerstone of any successful and enjoyable woodworking endeavor. Gathering high-quality materials and heavily testing your reliable power tools beforehand directly prevents frustrating interruptions and dangerous mistakes during your floating desk project. At a bare minimum, you will require a high-powered circular saw or table saw for making perfectly straight rip cuts, alongside a reliable power drill and impact driver combo kit for driving heavy fasteners.
In addition to your primary cutting and drilling tools, precision measurement and alignment instruments are absolutely mandatory for a polished, level result. You must invest in a high-quality, electronic deep-scanning stud finder and a highly accurate four-foot aluminum level to guarantee your desk sits perfectly flat and securely attached to the structural framing. A pocket hole jig system, such as a Kreg Jig, is also highly recommended, as it allows you to create incredibly strong, completely invisible internal wood joints without needing complex traditional joinery techniques. Integrating these modern tools represents a phenomenal leap in accessible modern woodworking techniques for home DIYers.
Selecting the Right Lumber and Hardware
When selecting the lumber for your project, you must strategically categorize your purchases into two distinct groups: structural internal framing wood and visible external finishing wood. For the hidden internal cleat structure, standard kiln-dried 2×4 framing pine is perfectly acceptable, provided you meticulously inspect the boards at the hardware store to ensure they are perfectly straight and entirely free of severe twists or warping. A warped internal frame will force your outer desktop shell to warp as well, entirely ruining the flat working surface you so desperately need.
For the visible exterior shell of your desktop, we heavily recommend utilizing premium hardwood veneered plywood, such as birch, oak, or walnut, rather than incredibly heavy solid wood slabs. Investing in a premium three-quarter-inch hardwood plywood guarantees a stunning, exceptionally durable desktop that will gracefully withstand years of heavy computer use while remaining incredibly lightweight. To better understand why engineered wood panels are often superior to solid wood for large, flat, hollow-core desk builds, you can read extensively about the fascinating manufacturing of plywood and its incredible cross-grain dimensional stability. You will also need heavy-duty structural screws, specifically five-sixteenths inch thick by four-inch long lag bolts, alongside premium wood glue, brad nails, and matching wood filler.
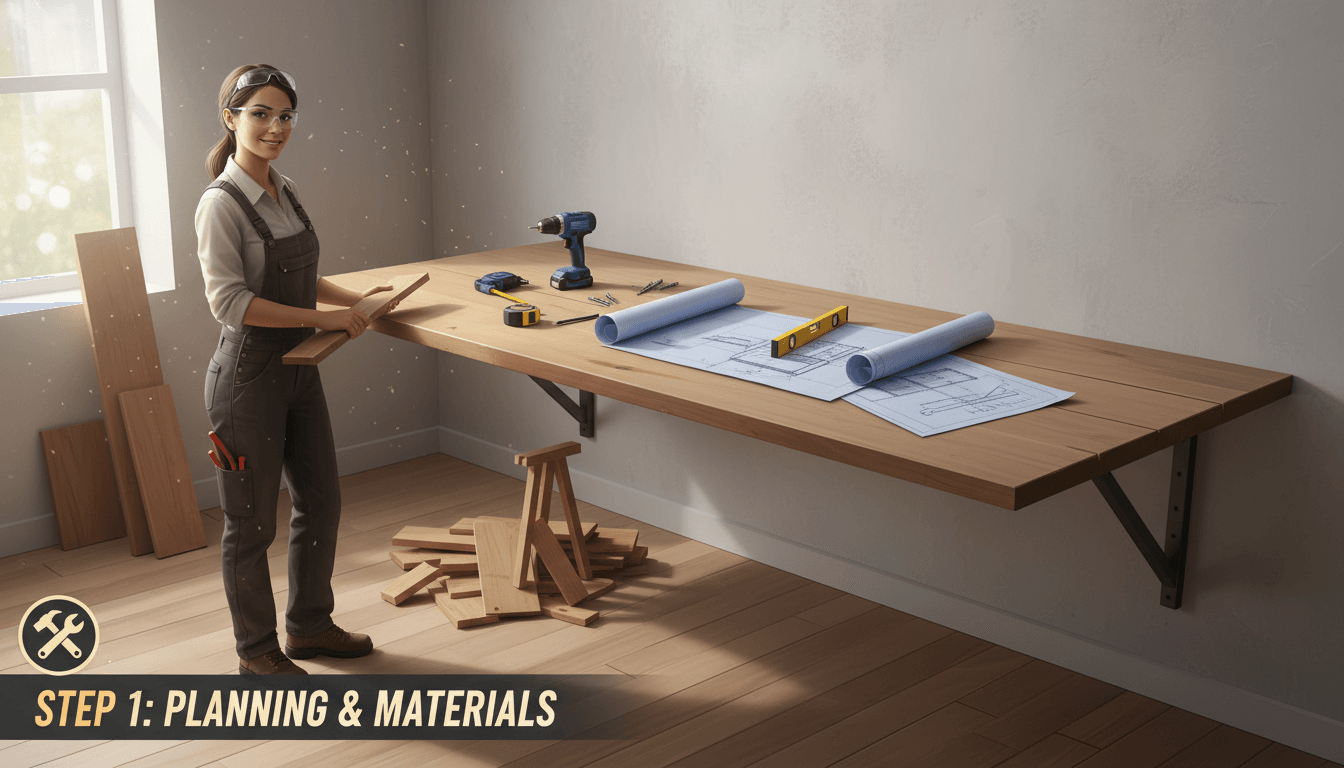
Step 1: Measuring and Planning Your Home Office Space
Determining Ergonomic Heights
The golden rule of professional carpentry and woodworking is always to measure twice and carefully cut once. Accurate spatial planning and meticulous measuring ensures that your completed floating wood desk fits flawlessly and seamlessly into your chosen alcove or dedicated wall space without requiring disastrous last-minute modifications. Start the physical planning phase by determining the absolute ideal height for your desk surface based on your body dimensions and chair height.
Standard ergonomic desk height in modern offices is typically strictly maintained between 28 to 30 inches from the floor to the top of the desk surface. To find your personal optimal height, sit comfortably in your fully adjusted office chair with your feet resting flat on the ground, and measure the distance from the floor to the bottom of your resting elbows. Your keyboard should ideally rest exactly at this elbow height to prevent severe long-term shoulder strain, wrist fatigue, and debilitating carpal tunnel syndrome during extended marathon work sessions.
Calculating Desk Depth and Width
Once you have confidently established your perfect ergonomic height, you must deeply consider the physical depth of your desk surface, keeping in mind the size of your primary monitors and whether you require significant room for a large keyboard tray or oversized mousepad. A highly functional desk depth of 20 to 24 inches usually provides ample, comfortable workspace without protruding too aggressively far into the room’s central pedestrian walkway. If you intend to utilize ultra-wide monitors or mount heavy dual-screen arms directly to the back of the desk, leaning closer to a 24-inch or even 28-inch depth will comfortably accommodate the large monitor stands while preserving crucial foreground writing space.
When heavily calculating your overall vertical measurements, you must absolutely remember to accurately account for the total thickness of the internal wooden frame plus the thickness of the top and bottom plywood panels. Failing to subtract the physical thickness of your desk shell from your final wall-mounting height will disastrously result in a desk that sits several inches higher than you originally intended. Always sketch out a precise, scaled cross-sectional diagram of your desk layers on graph paper before marking any permanent lines on your beautifully painted home office drywall.
Step 2: Locating Wall Studs and Preparing the Support Frame
Understanding Your Wall Structure
A true floating desk is entirely and completely reliant on the underlying structural integrity of your room’s physical walls. Because a floating desk acts as a massive physical lever that forcefully pulls against the wall, securely anchoring your internal frame directly into the dead center of your wall studs is a completely non-negotiable safety requirement. Relying merely on plastic drywall anchors or heavy-duty toggle bolts, regardless of their generously advertised maximum weight ratings, is incredibly dangerous and will inevitably result in catastrophic structural failure when you lean your body weight heavily on the desk edge.
To ensure total safety, you must use a high-quality, freshly calibrated electronic stud finder to meticulously locate and sharply mark the exact dead center of every single vertical stud situated within the span of your planned desk area. Taking the time to deeply understand the architectural framing behind your drywall by reviewing the standard properties of a wall stud framework will dramatically increase your confidence during the heavy drilling phase. Most modern North American residential homes feature wooden wall studs strategically spaced exactly 16 inches apart on center, which will reliably dictate exactly where you must place your massive lag bolts.
Building the Internal Cleat Skeleton
Once every applicable wall stud is clearly marked with a vertical pencil line, it is finally time to build the heavy-duty internal support skeleton, commonly known in professional carpentry as a torsion box core or a structural cleat frame. Using your carefully selected, perfectly straight 2×4 lumber, you must construct a robust U-shaped or E-shaped internal frame that will boldly act as the hidden, indestructible anchor bolted directly into the wall framing. Cut a long back piece of 2×4 that spans the entire width of your desk, and then cut several shorter perpendicular 2×4 “arms” that will violently project outward away from the wall to support the depth of the desk.
Assemble this heavy wooden skeleton on the floor using premium wood glue and three-inch long wood screws driven strategically through the back piece and directly into the projecting arms. Once the skeleton is fully assembled, physically lift it onto the wall at your pre-determined height line, use your four-foot aluminum level to ensure it is perfectly horizontal, and aggressively drive your heavy lag bolts through the back 2×4 directly into the marked wall studs. You must ensure you drive at least two heavy lag bolts into every single available wall stud that the back frame crosses to absolutely guarantee maximum structural rigidity and immense weight-bearing capacity.
Step 3: Building the Wooden Desktop Shell
Cutting and Assembling the Wood Panels
With the heavy-duty structural support cleat now firmly and immovably attached to your office wall, you can excitingly shift your primary focus to crafting the main visual attraction: the beautiful desktop shell. Crafting the sleek desktop shell involves precisely cutting your chosen hardwood veneered plywood to size and assembling a hollow core slip-cover structure that perfectly slides right over the massive wall frame. This highly popular slip-cover design gives the breathtaking illusion of a solid, incredibly thick slab of expensive timber while remaining surprisingly lightweight enough to be easily supported by the cantilevered wall bracket.
You will need to carefully cut a top plywood panel and an identical bottom plywood panel that closely match your total desired desk width and depth measurements. To seamlessly hide the ugly, layered edges of the exposed plywood cuts, you must skillfully attach thin, solid hardwood trim pieces to the front and side exposed edges of your top and bottom panels using wood glue and fine brad nails. This critical edge-banding or solid wood trim technique completely seals the hollow shell, flawlessly hiding the internal 2×4 skeleton from all viewing angles once the shell is finally slid into its permanent position.
Ensuring Seamless Joints and Flat Surfaces
If your specific desk design requires securely joining multiple boards together to create a massive, solid wood top rather than utilizing a single continuous sheet of plywood, you will absolutely need to heavily utilize premium wood glue and staggered pocket hole screws to create a seamless, indestructible bond. Applying massive, mathematically even clamping pressure across all of your glued joints during the overnight drying process is incredibly essential for achieving a perfectly flat, warp-free, and virtually invisible seam. You must take your absolute time during this delicate step, as any accidental warping, bowing, or noticeable gaps will be highly visible and incredibly distracting on the final working surface.
For those utilizing plywood panels, ensuring the top work surface remains pristine and deeply scratch-free during the rough assembly phase is highly paramount. Always assemble your hollow wood shell upside down on a heavily padded surface, such as a thick moving blanket or large piece of foam insulation, to strictly prevent accidental gouges and severe scratches from concrete garage floors or stray screws. If you want to completely skip the incredibly stressful cutting and gluing assembly phases, you can effortlessly browse our stunning custom desk gallery and order a meticulously pre-fabricated shell tailored directly to your home’s unique dimensions.
Step 4: Sanding, Staining, and Finishing the Wood
The Sanding Progression for a Smooth Finish
The extensive, often tedious finishing process is the magical transformation phase that turns rough, unrefined lumber into a breathtakingly elegant piece of custom home furniture. A highly meticulous, incredibly patient sanding routine, methodically progressing from a coarse 80-grit paper all the way up to a remarkably fine 220-grit paper, is strictly necessary to achieve a flawless, glass-smooth desktop that feels phenomenal under your bare wrists. Always ensure you heavily sand strictly in the natural direction of the wood grain to completely avoid leaving deep, highly unsightly cross-grain scratches that will be glaringly magnified the moment you apply your liquid stain.
Wood dust is notoriously hazardous to your long-term respiratory health, especially when power-sanding chemically engineered materials like MDF or industrial plywood for long, continuous hours. You must strictly adhere to fundamental safety protocols; the official OSHA guidelines on wood dust highly recommend utilizing proper NIOSH-approved respiratory protection masks and actively employing heavy-duty shop vacuums for localized dust extraction. After successfully achieving a phenomenally smooth wood surface, thoroughly remove every microscopic particle of lingering dust using an air compressor and a sticky tack cloth before even thinking about opening your liquid stain cans.
Applying Stain and Protective Topcoats
With your beautifully sanded wood completely prepped and flawlessly clean, you can finally apply your chosen colored wood stain or rich, natural penetrating oil to intensely pop the gorgeous grain patterns. Liberally apply your chosen stain using a clean, lint-free cotton rag, let it deeply penetrate the porous wood fibers for roughly five to ten minutes, and then aggressively wipe off all remaining excess liquid to ensure an incredibly even, non-blotchy color distribution. Allow the freshly applied stain to fully dry in a well-ventilated area for a minimum of twenty-four to forty-eight hours, depending entirely on the ambient humidity levels and specific manufacturer instructions.
The final, most critically protective step is aggressively sealing the freshly stained wood to aggressively defend it against daily office hazards. Applying a premium, high-quality polyurethane topcoat will hermetically seal the porous wood fibers, highly protecting your beautiful desk surface from damaging water rings, accidental ink spills, and the daily microscopic friction caused by sliding keyboards and computer mice. We highly recommend painstakingly applying a minimum of three thin, even coats of liquid polyurethane, making absolutely sure to lightly scuff the surface with an ultra-fine 320-grit finishing paper between every single coat to achieve an impeccably smooth, professional-grade finish.
Step 5: Mounting the Floating Desk Securely to the Wall
The incredibly satisfying moment of absolute truth has finally arrived as you actively prepare to permanently attach the gorgeously finished wooden shell to the heavy-duty, wall-mounted skeleton structure. Carefully lift the hollow desktop assembly, carefully align the open back cavity with the protruding 2×4 wall frame arms, and slowly slide the shell directly over the skeleton, ensuring a remarkably snug, tight, and completely secure friction fit. Because the finished wooden desktop can be incredibly unwieldy, surprisingly heavy, and highly prone to accidental wall scratching, it is incredibly highly recommended to enlist the physical help of a reliable assistant for this specific mounting step.
As you aggressively push the beautiful wooden shell back tight flush against the painted drywall, ensure there are absolutely no highly visible, unsightly gaps between the rear edge of the desk and the wall surface. To fully permanently secure the heavy desk shell to the internal frame and completely prevent it from accidentally sliding off during use, you must carefully drive finishing screws or brad nails directly through the top or bottom of the plywood shell straight into the hidden internal 2×4 lumber. Securing it heavily from the bottom up is the highly preferred professional method, as it completely hides the shiny metal screw heads from normal daily viewing angles.
If you forcefully decide to heavily screw down directly through the very top surface of the desk for maximum downward holding strength, you must actively ensure you cleanly countersink the metal fastener heads deep below the wood surface. Meticulously countersinking these top fasteners and carefully filling the remaining recessed holes with a perfectly color-matched wood putty will beautifully maintain the completely clean, uninterrupted floating illusion of your impressive new workstation. Always remember to swiftly wipe away any wet, excess wood putty immediately with a damp rag to heavily preserve your pristine, glossy polyurethane topcoat from ugly chemical smudging.
Step 6: Cable Management and Final Workspace Touches
A beautifully constructed, modern home office setup is functionally incomplete without intelligently addressing the highly inevitable, notoriously ugly tangle of modern computer cords, charging wires, and power bricks. Carefully utilizing a sharp hole saw to loudly drill a strategically placed circular grommet hole near the very back corner of your beautiful desk allows you to intelligently route all ugly electronic cables discreetly down and completely out of regular sight. You can then aggressively mount a heavy-duty, surge-protecting power strip and spacious plastic cable raceways directly underneath the desk, securely attaching them to the hidden bottom plywood panel of your rigid floating structure.
Implementing smart, highly invisible cable management actively ensures that the gorgeous, minimalist floating aesthetic of the desk is not completely ruined by a chaotic, highly distracting waterfall of black wires dangling aggressively onto the floor. Keeping all of your essential electronic cords perfectly organized, tightly bundled, and physically elevated completely off the floor heavily enhances the incredibly clean, modern vibe of your highly productive new workspace. Once your massive monitors are fully mounted and your glowing mechanical keyboard is plugged in, take a moment to beautifully adjust your ambient lighting; adding a sleek LED light strip deeply hidden under the front lip of the desk adds an incredible, futuristic nighttime glow.
Conclusion: Enjoying Your New Home Office Workspace
Taking the ambitious initiative to personally build a highly custom, structurally robust floating wood desk is a truly phenomenal way to massively upgrade your daily remote work environment while simultaneously honing your practical DIY carpentry skills. By meticulously measuring your spatial dimensions, aggressively securing your heavy-duty frame straight into the wooden wall studs, and patiently applying a flawless, professional-grade protective finish, you have successfully created a highly functional work of art. This intensely tailored, highly personal approach to home furniture building consistently yields impressive physical results that far surpass the flimsy quality, severe wobbliness, and boring aesthetics of cheap, mass-produced flat-pack retail alternatives.
We sincerely hope this incredibly comprehensive, highly detailed guide on how to build a floating wood desk for your home office step by step has successfully empowered you to boldly tackle this rewarding project with absolute, unwavering confidence. Your breathtaking new floating desk will reliably serve as an incredibly inspiring, fully clutter-free daily productivity hub for many successful professional years to come. If you happen to have any highly specific, complex architectural questions during your build or deeply realize you need customized fabrication assistance, please do not hesitate to directly contact our expert woodworking team today for professional guidance and support.